
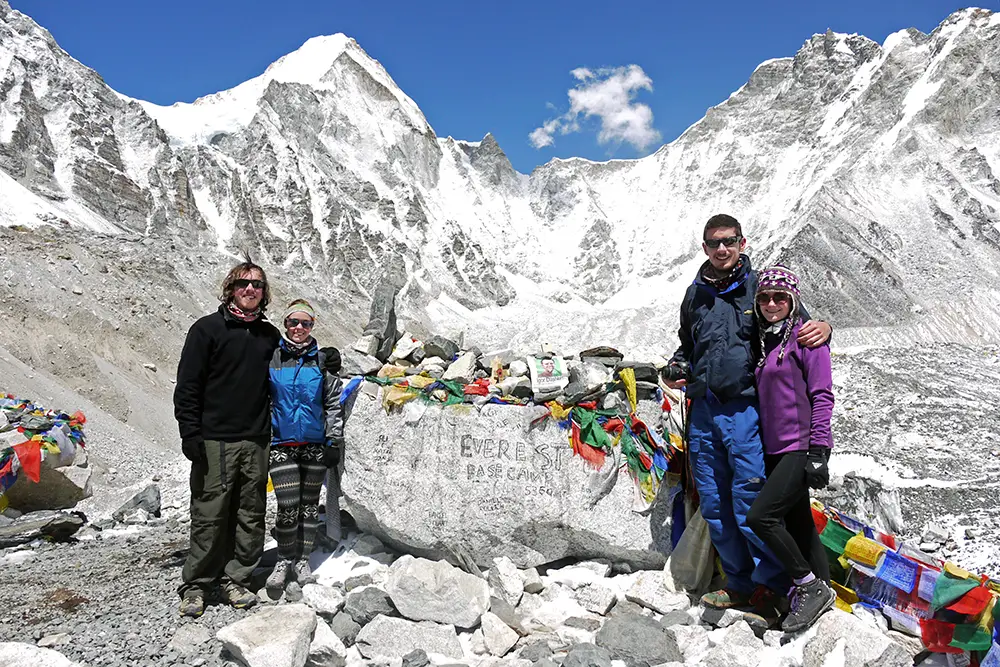
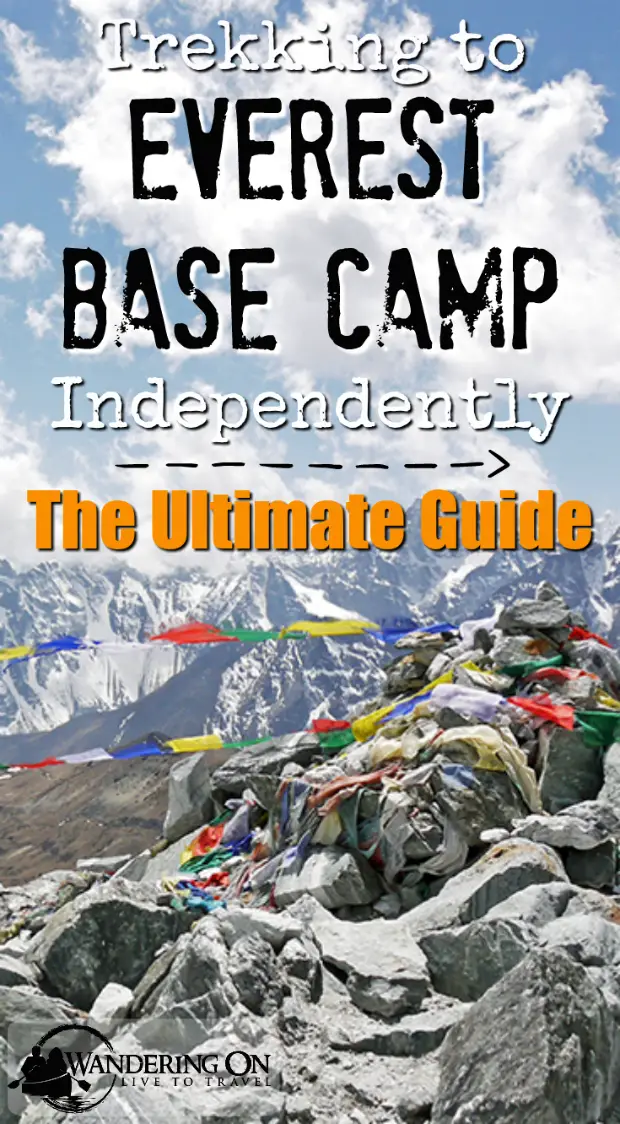
Finally, a place where all your questions about doing the Everest Base Camp trek independently, solo, without a guide or porters or without joining a tour group, are answered.
Doesn’t it cost sooo much? Do you have to be really fit? Don’t you need mountain climbing experience? Isn’t it dangerous? Do you need a lot of gear/equipment?
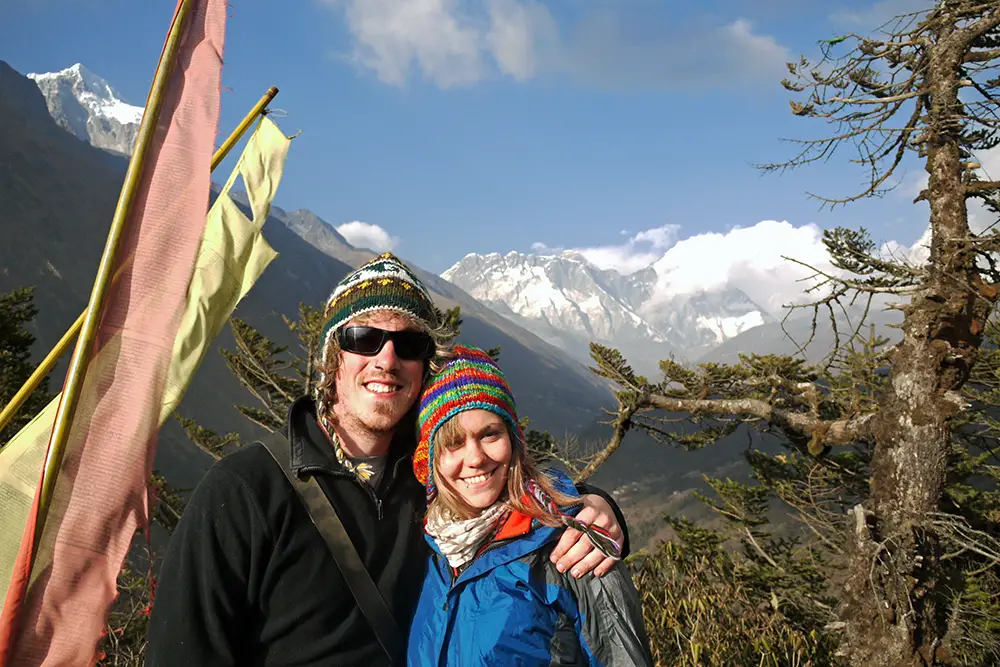
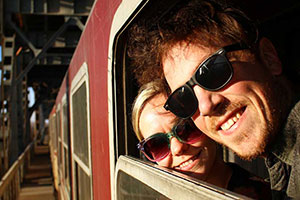
I remember being so nervous and having so many questions like these when we were planning the Everest Base Camp trek. We were heading to Nepal for three months after finishing our contracts in Korea with our good friends Mike and Linda, another Irish couple who we met during our two and a half years teaching English in Iksan. Brian and Linda, the more adventurous sides of both couples, were all guns blazing “We are definitely doing it!”, “It’s a once in a lifetime opportunity!”. Mike and I, the less adventurous side of both couples, were apprehensive, to say the least.
A friend of Linda’s parents had done the EBC trek a couple of times and she had picked their brains a bit while at home that Christmas and it was definitely doable. They had also walked the Camino de Santiago a few times and cycled around Australia so we knew they were fit, outdoorsy, adventurous people.
We, on the other hand, had never done an overnight hike and our greatest mountaineering achievement to that point had been climbing Hallasan, South Korea’s highest peak, a whopping 1,950,m (6,398 feet) which took all of 8 hours round trip with steps and railings all the way – Korean style!
But Linda’s friend’s parents assured her that four healthy, able-bodied twenty-something-year-olds would have no problem hiking to EBC, especially with guides and porters.
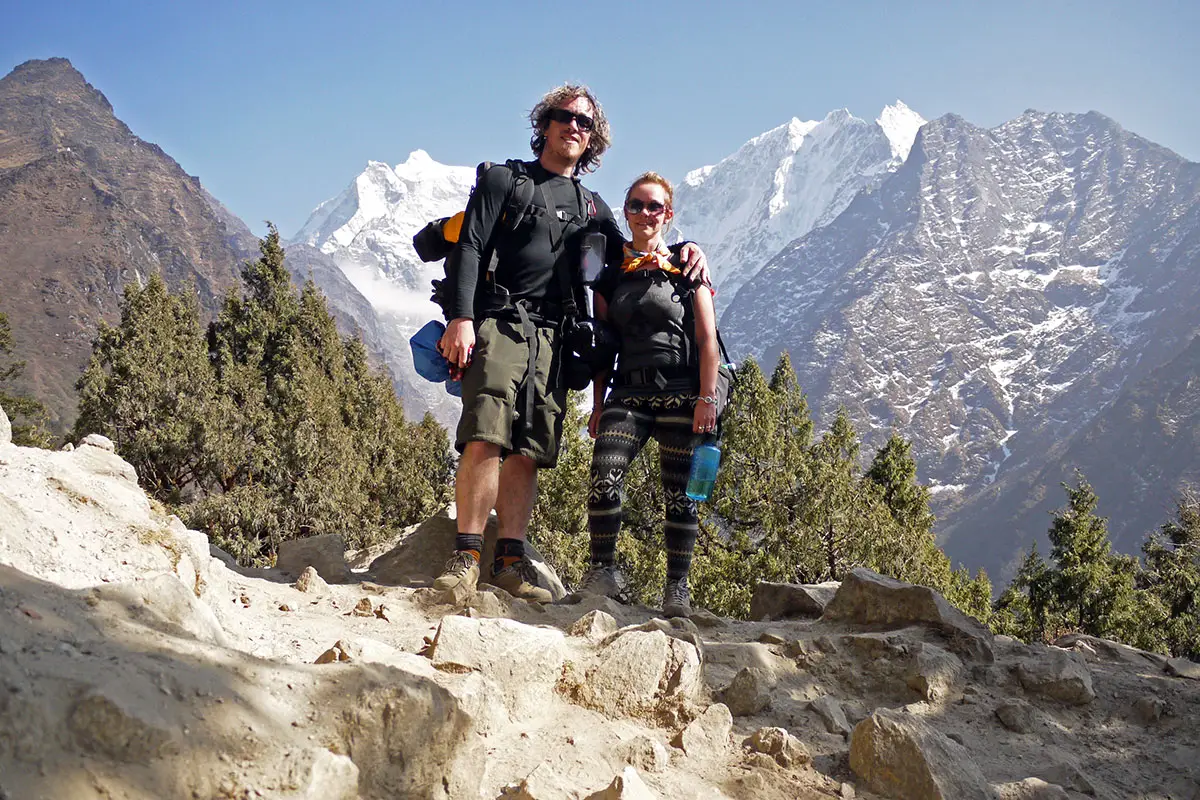
Hiking The Everest Base Camp Trek Solo, Without A Guide
But we wanted to take on the trek to Everest Base Camp independently. It was important to us to do it ourselves, carry our own bags, have flexibility and save ourselves lots of money in the process.
We researched online, asked questions on forums and contacted people who had done it before. The information was scattered everywhere and we couldn’t find a single comprehensive, complete guide to trekking to Everest Base Camp independently, so we wrote this guide to show you how straightforward and affordable it is to take on the Everest Base Camp trek independently.
Let’s get started on answering all those questions we had and you no doubt have too.
Everest Base Camp Trek Difficulty

Do you have to be really fit? Don’t you need mountain climbing experience?
Fitness And Experience
We thought we needed to be fit so we had planned that after three weeks at home in Ireland over Christmas we would spend the final two months in Korea finishing out our contract training up for EBC by hiking the nearby mountain weekly. Well … that never happened and we ended up spending the two months enjoying the home comforts of winter which generally involved eating, drinking and being lazy while it snowed outside! We figured we’d get fit on the hike, and we did!
So that answers that question – any able-bodied person in reasonable physical shape can hike to EBC, even if you’ve never done an overnight hike before.
How Much Does The Everest Base Camp Trek Cost?
Doesn’t it cost a fortune?
A lot of people ask us how we afforded to hike to Everest Base Camp or say that they can’t afford it when they’re planning a trip to Nepal. Let us just say now, it is one of THE cheapest things we have ever done on our travels. The cost of living in Nepal is very low and you can easily backpack while enjoying a very comfortable lifestyle – eating in nice restaurants, having coffees, sightseeing and staying in a private room, all for the grand total of about €20 a day.

Guided Tours To Everest Base Camp
Yeah sure, if you Google ‘hike to Everest Base Camp’ you will find tour companies willing to take you on an all-inclusive package for crazy money compared to what you’ll spend on the ground yourself. Consider that they have to pay guides and porters, the teahouses and your meals and cover all their overheads and still make a profit. In the end, we chose to forgo guides and porters and do it totally independently, carrying our own packs and finding our own way and this cut our costs hugely! Even aside from costs, we’re so happy we did it this way, it felt so much more adventurous than having our hand held throughout the experience.
If you do feel more comfortable having company and want to hire a guide/porter it costs anywhere from €15-€50 a day depending on their experience. And remember you’ll have to pay for their flights to/from Lukla also. The cheapest way to hire a guide is to wait until you’re in Lukla, this way you can have a mini interview to see if you get along well and you save on the cost of their flight.
Our Everest Base Camp Trek Budget
We spent less than €15 a day each overall which included the price of the flight from Kathmandu to Lukla which was an awesome experience in itself! If you include the things we bought or rented, the TIMS permit and entrance fee to Sagarmatha National park, we would say it still averages out at €25 a day ABSOLUTE maximum. This is taking into account that we hiked in the region for 22 days, adding on an extra 5 days to take in Gokyo Lake. We also chose to fly into Lukla and walk out as far as Shivalaya where you can take a bus back to Kathmandu and this saves half the cost of the flight. 5 days extra walking to save €120 may sound crazy but this can equal 6 days of spending money backpacking in Nepal!
Most people walk in from Jiri or Shivalaya and fly back from Lukla as the Jiri to Lukla part trains you up for the walking further on the trail. This section is the toughest part as you are constantly going up and down cutting through the valleys even though you are at a lower altitude.
How To Plan For The Everest Base Camp Trek
Preparation On The Ground In Nepal
After spending some time in Kathmandu and going up to the Tibetan border at Kodari, we had procrastinated enough. We were all apprehensive about the trek to EBC but we had been in Nepal for over two weeks now and we had to stop putting it on the long finger.
When we went to rent gear at Shona’s Alpine rental store the extremely friendly owner and British climber Andy Griffeths put us all at ease by saying something that definitely put Mike and me at ease anyway – “It’s as simple as following the yellow brick road!”
He also told us to switch our plan of walking in from Jiri and flying out of Lukla to the opposite – fly in and walk out to beat the crowds! With his experience (the man is the real deal – he has summited Lhotse 8,516 m/ 27,940 ft, the fourth highest peak in the world and lost sight in one eye in the process!) we took his advice and weren’t going to argue.
He and his wife, who is Shona, were a wealth of information on what to expect. We asked loads of questions; whether or not we needed guides and porters, what to bring, what to wear, and anything else you could imagine. He even gave us the great tip of not to shower after Namche as we’d never get our hair dry at that elevation and would get sick unless we sat by the fire in the teahouse until dry. Also, you have to pay for hot showers on the Everest trek so it keeps the costs down. Yes, we didn’t shower for 10 days – gross, I know, but it’s all part of the experience! As a girl with oily hair, I recommend bringing dry shampoo and a bandana – they’ll be your best friends!
He also had another great tip – to put our socks or any other damp clothes in our sleeping bags at night or under our clothes to get them to dry from body heat which helped us a lot. They were so helpful and so fair, they didn’t try to sell us unnecessary things – they spelled out exactly what we needed. He was the one that assured us we could carry our own gear and wouldn’t need a guide, which again dramatically reduced our costs.
You can rent/buy everything you need from them and we highly recommend their store, it really is a one-stop shop for anyone planning the Everest Base Camp trek.
Storage Of Large Luggage While You Trek

All guesthouses and hostels in Kathmandu and Pokhara will store your large luggage free of charge while you trek in Nepal provided you’ve been staying with them beforehand. We stayed in Family Peace House in Paknajol before we left Kathmandu and when we came back and our things were safe and secure with them for three weeks. Brian even stored his things in massive black bin liners (so secure!) as he brought his own backpack.
Before The Trek
Organising The Necessary Permits For The EBC Trek: Update 2020
One of the most important items you need before trekking anywhere in Nepal is a TIMS (Trekkers’ Information Management System) card. Both Individual trekkers and trekkers going with an organised group need to purchase a TIMS card as it is a record of your trek kept for your safety. Individuals pay $20 and get a green card and those going with groups pay $10 and receive a blue card. You can collect your TIMS card at the Nepal Tourism Board in Kathmandu at Pradarshani Marg, Kathmandu 44617. You need your passport and two passport photos which you can get taken in Thamel if you don’t have some already. There is also an office in Pokhara so you can pick up a TIMS there as well. If going trekking again in the Annapurna or any other region in Nepal, keep in mind that you do have to get a separate TIMS every time. You also have to be present in person if applying for a green independent TIMS card. If you’re applying for an organised blue TIMS card you do not have to be there in person – the tour company can collect it on your behalf.
You also need an entry permit for the National park. On the Everest Base Camp trek, you can pay for your entry permit at the entrance to Sagarmatha National park at Monjo. Just show your passport and TIMS and it costs 3000 NPR + a new 13% tax =3,390 NPR (around €30). Simples! It’s also interesting to see the board they have up with the numbers of tourists who pass through each month.
For other areas in Nepal, you need to have an entry permit to trek in the conservation areas in advance from the National Trust for Conservation which you can also pick up at the Tourism Board for 2,000 NPR (around €20) and two passport photos. You also need individual permits for each conservation area visited if your trek passes through more than one area.
Everest Base Camp Trek TIMS And Fees: Update 2020
From October 1st, 2017, there is now an entry fee of 2,000 NPR on each foreigner visiting Khumbu region, which Everest Base Camp is a part of. This is a local government entrance fee imposed in the Solukhumbu district and cannot be paid in advance. It can be obtained only in Lukla for both organised and individual independent trekkers. You do not need a photo for this permit. Because of this new charge, a TIMS card is not required for independent trekkers going from Lukla to EBC. It seems organised trekkers still need one as it covers basic insurance for guides and porters, however, it’s a little unclear. It’s best to ask around on the ground in Nepal.
If you’re trekking from Jiri to Lukla and on, certain areas are protected under the Gaurishankar Conservation Area Project (GCAP), so you’ll need to get the GCAP entry permit for this area in advance. It costs Rs 2000 for both organised and independent trekkers and you have to get this permit from the Tourism Board in Kathmandu. If you are trekking independently, you’ll need two photos and the application form. If you want to save time, you can download, print and fill out this application form here and take it to the Nepal Tourism Board in Kathmandu at Pradarshani Marg, Kathmandu 44617 with your photos and cash.
Note that you may still need the TIMS card for this portion of the trek, as there are TIMS checkpoints on route from Jiri to Lukla.
Flying From Kathmadu To Lukla: Update 2020
Due to renovation works to Tribhuvan International Airport’s (TIA) runway, flights from Kathmandu to Lukla were being diverted from TIA to Manthali Airport in Ramechhap from April 1st as an alternative route until June 30th 2019. However, taking into consideration the convenience for passengers and public demand, the Civil Aviation Authority of Nepal (CAAN) has decided to continue with regular flights on the Ramechhap-Lukla route even after the completion of the runway rehabilitation works of Tribhuvan International Airport.
As per the official notice issued by the Civil Aviation Authority of Nepal (CAAN), all Airlines are required to operate flights to Lukla from Manthali Airport, Ramechhap starting the trekking season of October 2019. This is also applicable for March, April and May of 2020.
CAAN has decided to allow airline companies to operate regular flights on the Ramechhap-Lukla route. Manthali Airport, Ramechhap is 4-5 hour drive from Kathmandu. While the drive is a bit of a hassle, chances of delays and cancellations from Manthali Airport are very low as the only air traffic from that airport is to/from Lukla.
Everest Base Camp Trek Independently – Route Options
When it comes to the Everest Base Camp trek there are a number of route options depending on how much time you have or want to spend trekking in the region. Most people fly in and out of Lukla and trek from there and back, the round trip taking between 11-15 days depending on your speed, fitness and how you feel at altitude.
For us, it took us 9 days to reach Everest Base Camp from Lukla and it would have taken us 3 days to get back to Lukla but we didn’t go directly back. We took all the safety and acclimatisation stops recommended at Namche and Pheriche on the way up, even taking an extra stop in Dughla. This additional stop was because when we were in Pheriche another group coming down told us they heard about a death in Lobuche due to altitude sickness. We didn’t want to take any unnecessary risks and so that added on an extra day.
You can also take a bus to Jiri or Shivalaya and hike from there and fly out of Lukla. This takes about 21 days and the hike in from Jiri will toughen you up for the higher altitudes.
You can also go seriously hardcore and hike from Jiri return over 26-28 days.
We ended up trekking to Everest Base Camp from Lukla and going down via Gokyo over the Cho La Pass and walking back to Shivalaya which took us 22 days in total.
Best Time Of Year To Trek To Everest Base Camp
Peak Season: October – November
Most people take on the Everest Base Camp trek during October and November when the weather is the most pleasant and there’s the best chance of clear skies. This is Nepal’s peak season as it is considered the best time to go trekking.
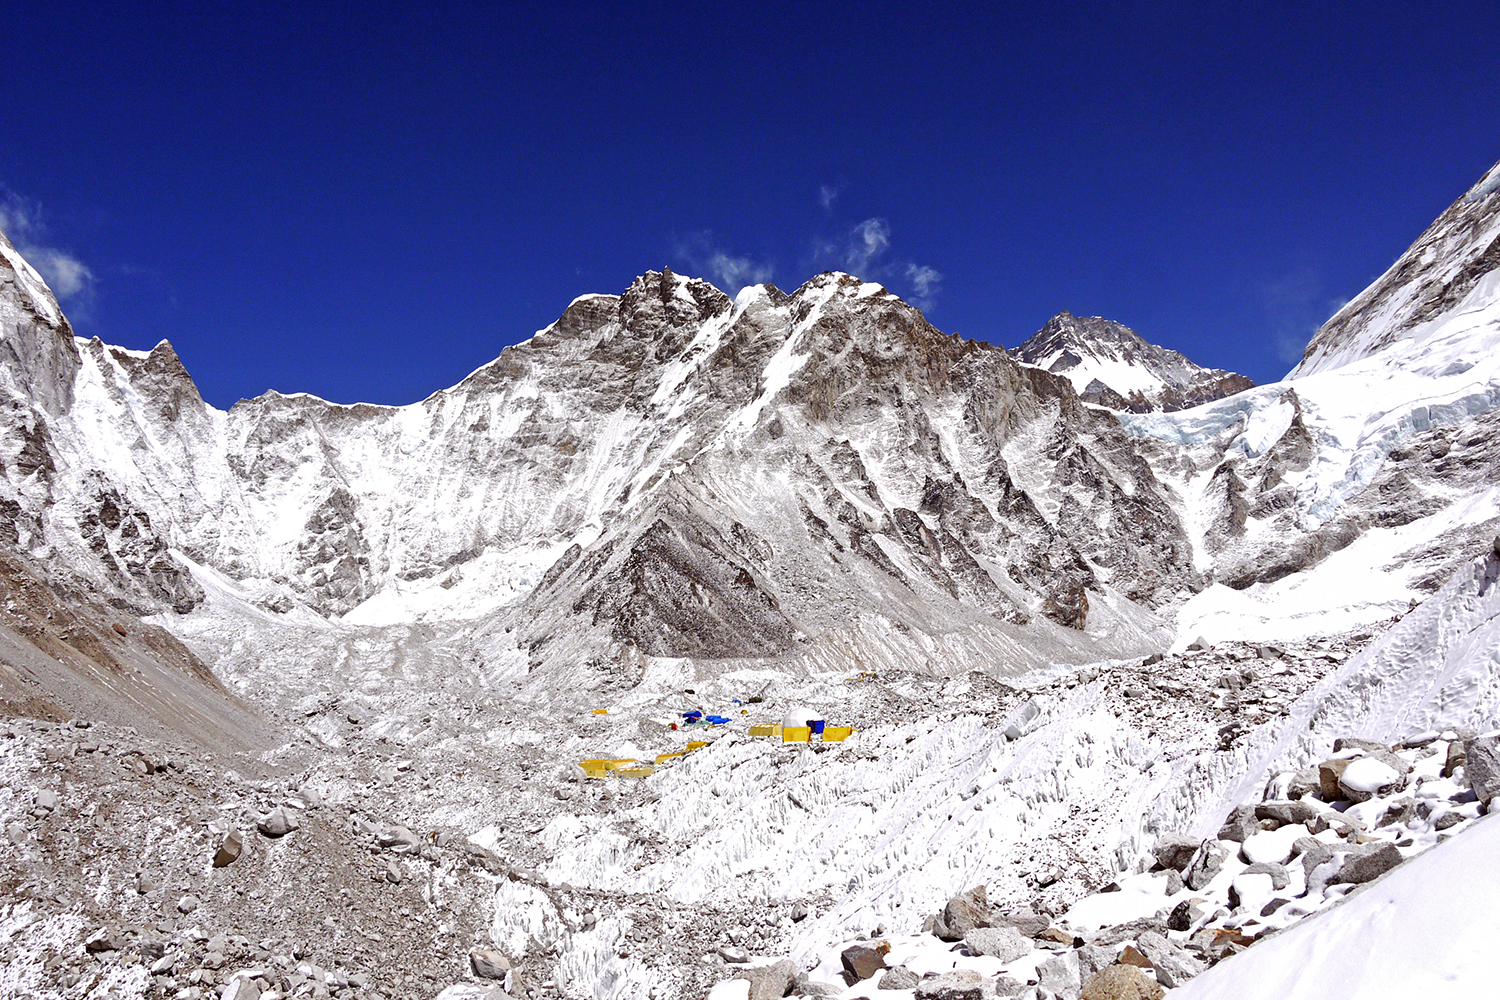
Note: When you reach Everest Base Camp at this time of year there may not be any tents there as the climbers and expeditions usually aim to summit in May.
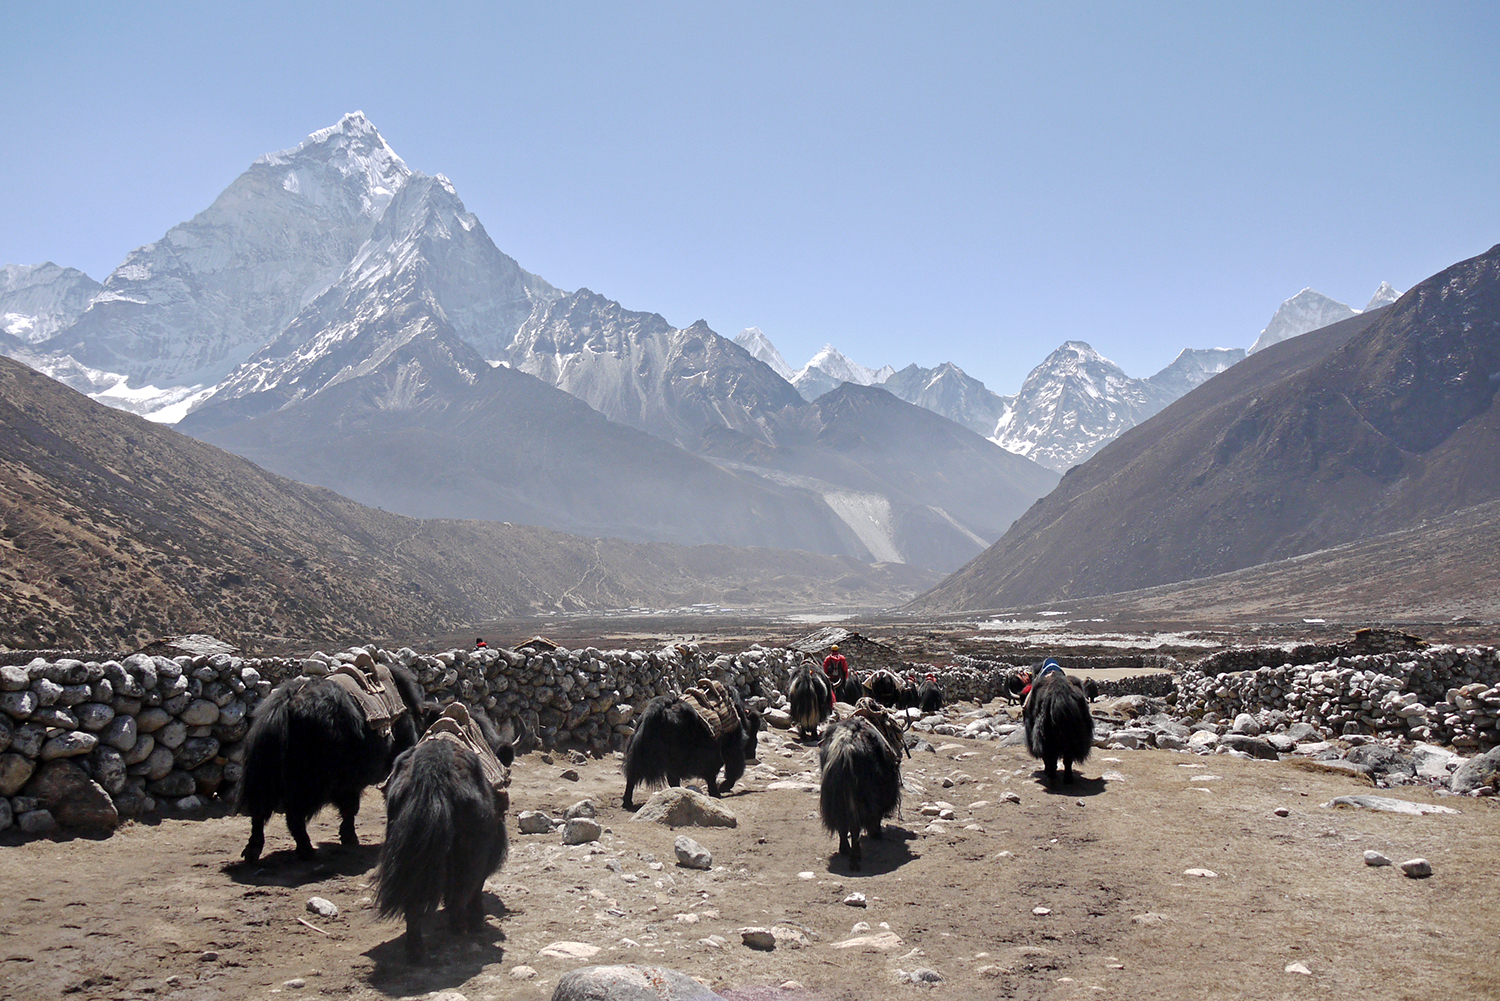
Second-Highest Season: (March) April – May
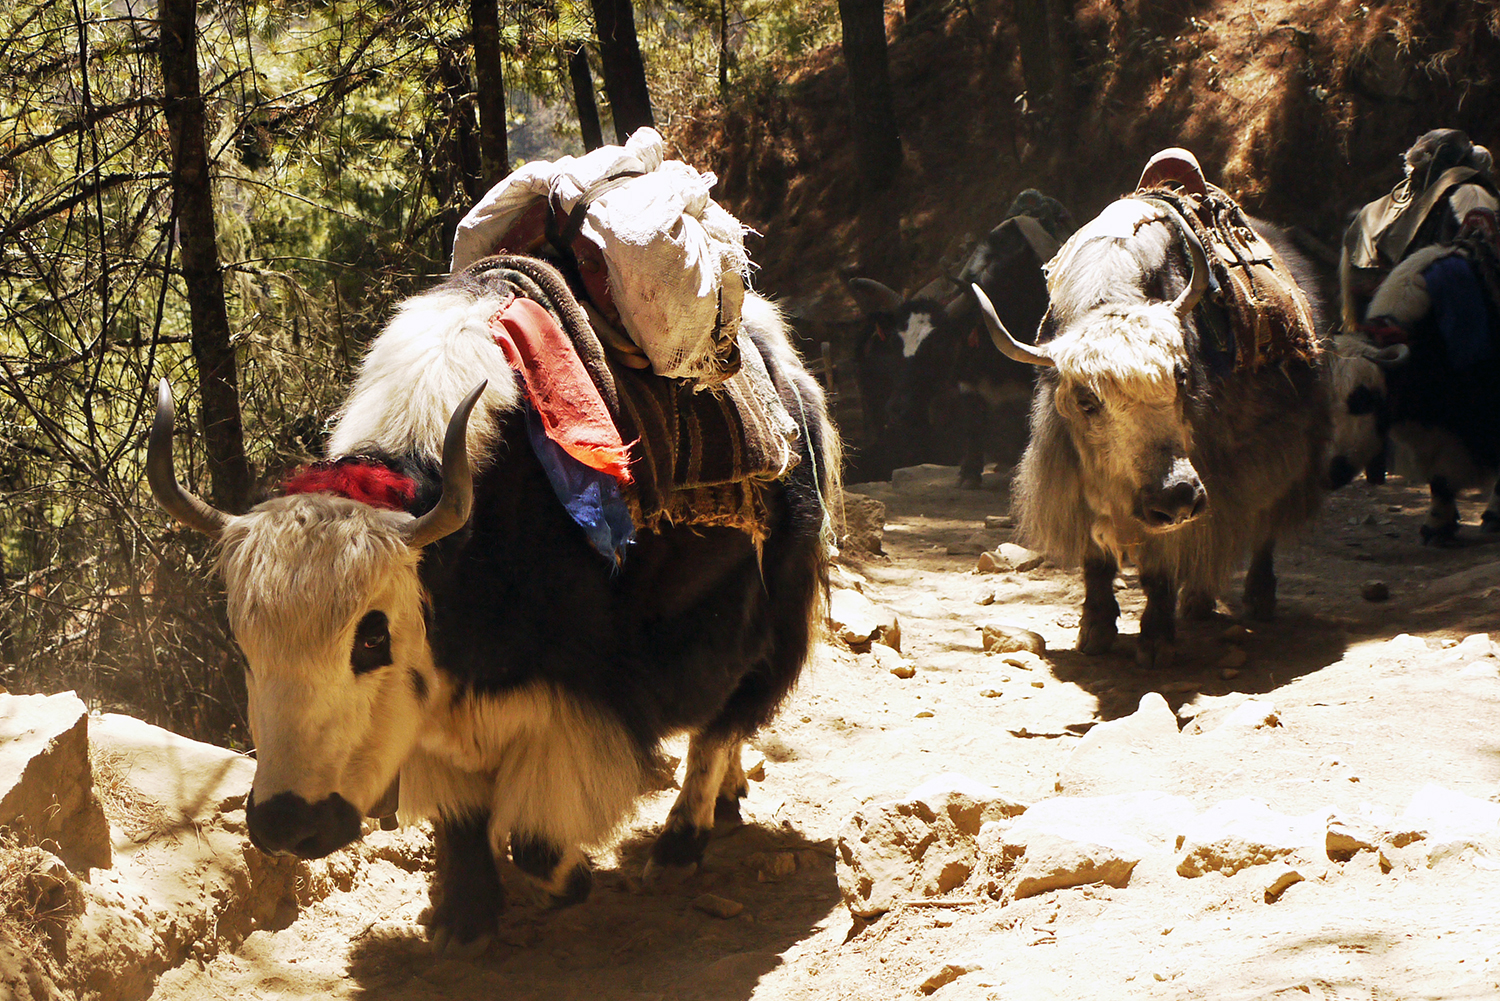
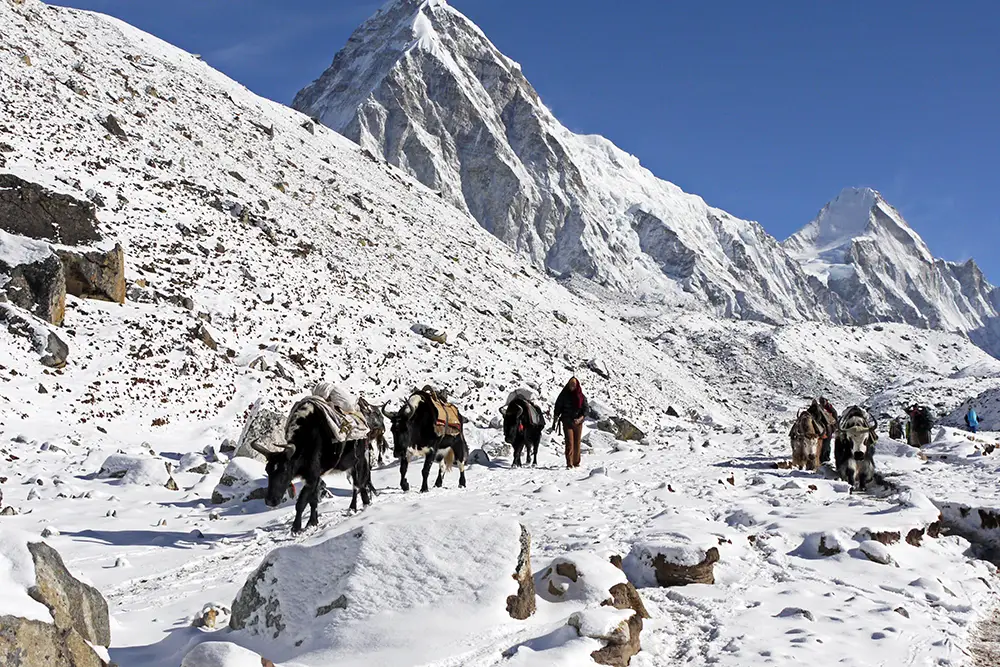
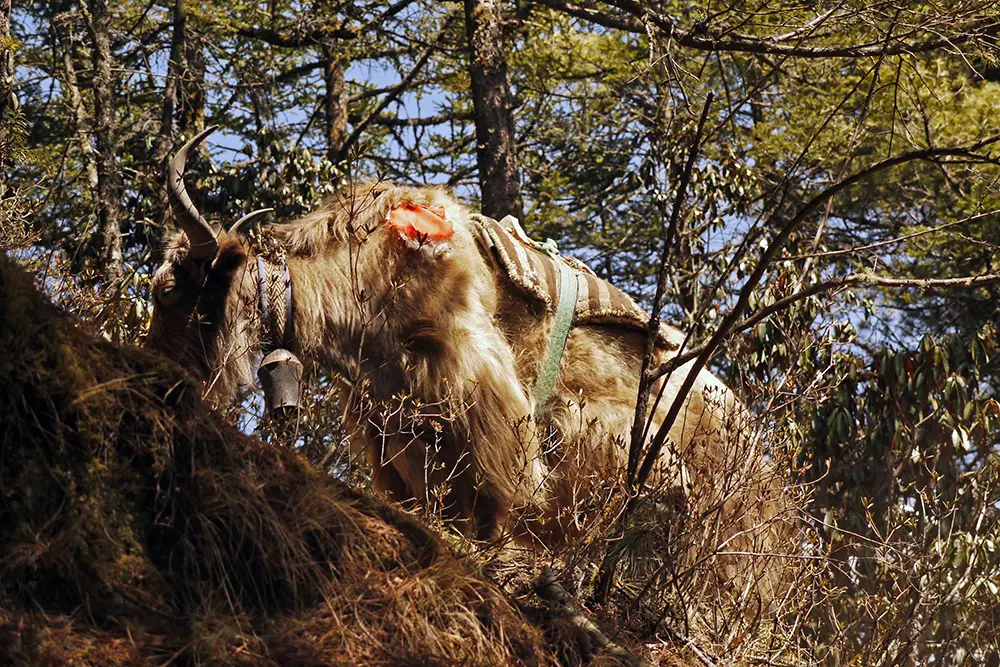
The second-highest season is from April to the end of May as t his is the end of the dry season and the second-best time of year to go trekking. At this time you’ll see the spring flowers and the yaks carrying up supplies for the climbers who summit Everest and there will definitely be tents at Base Camp. If you trek in late February and March you’ll be in ahead of the rush.
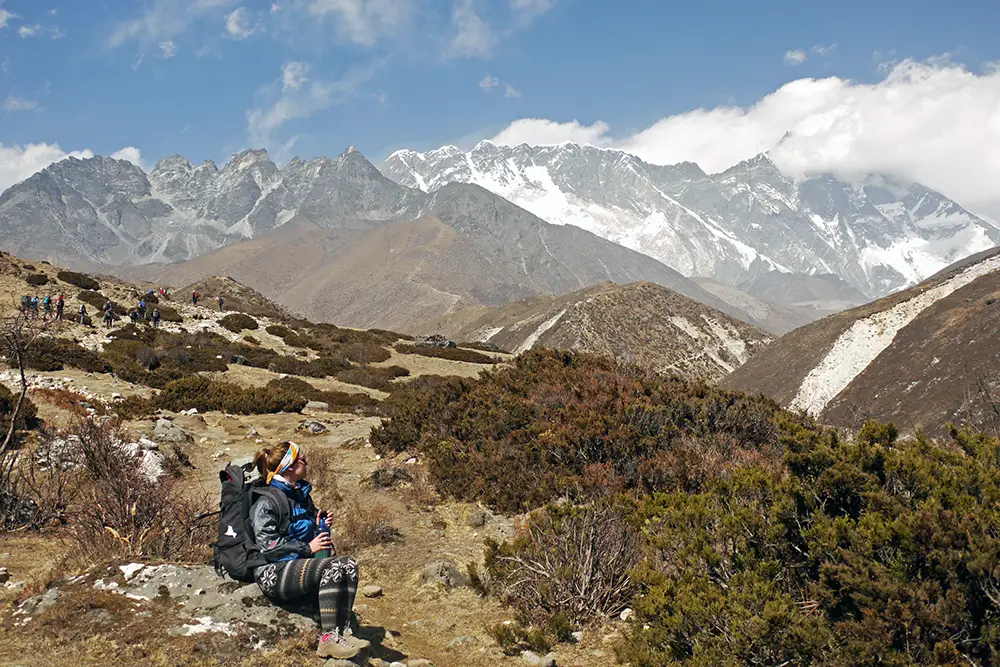
We did our trek at the end of March and we had amazing weather. When we were coming back down, the amount of people going up against us was quite a shock! I can’t imagine what it must be like in October/November.
Apparently, during the high seasons, there is a rush to get to teahouses every day and a chance of having to walk on to the next village for a bed or bunk up in the common room. Thankfully with Andy’s wise advice, we were slightly ahead of the rush so we didn’t experience this panic for beds.
Winter: December – February
You can hike in December, January and February too but be prepared for bitterly cold temperatures especially at night and a lot more snow at higher altitudes, which may cause cloudy skies and scupper your views of Everest. Others report incredibly clear skies at this tie of year.
Summer and Monsoon Season: May – September
From the end of May to June is the summer season so it can be uncomfortably hot and humid and due to this from June to September, it is generally not advised to hike in the region as the summer monsoon can cause landslides – not ideal trekking conditions!
What To Pack For The Everest Base Camp Trek

Do you need a lot of gear/equipment?
No, you don’t need much else other than a good set of hiking clothes, shoes/boots and a good backpack to trek to Everest Base Camp.
Everest Base Camp Trek Packing List
The bare minimum you’ll need is:
- a backpack with a good waist belt and comfortable straps. You will be carrying it every day for up to eight hours so it is essential that the shoulder straps and waistband are comfortable. We recommend the ones that open out like a suitcase over the top loader style backpacks, simply for convenience when packing and unpacking. We travel with the Osprey Farpoint 70 Litre backpack now. You won’t need a separate day bag and 50-70 litres capacity will be plenty.
- a rain cover for your backpack, not only handy for keeping your gear dry when it rains but also to protect your backpack from dirt, dust, rips and tears on the trail.
- thermal layers for underneath your clothes at higher altitudes. Two top layers and one bottom layer should be enough.
- a fleece, preferably a microfleece to save space.
- a windbreaker or rain jacket.
- a pair of windbreaker or rain pants.
- a well broken-in pair of hiking shoes or hiking boots (We prefer hiking shoes).
- comfortable hiking pants (I, Noelle, prefer to wear running leggings as I find them more comfortable).
- a good pair of polarised sunglasses with a hard case, carry a backup pair in case you lose or break one pair.
- a hat – any hat will do but a Sherpa hat will help you blend in with the locals and more importantly, the ear flaps will keep your ears warm at higher altitudes. You’ll see these on sale everywhere in Kathmandu. They’re cheap, depending on your haggling skills and make a great souvenir from Nepal. We still have ours.
- two pairs of gloves, one light wool or fleece pair and one pair for snow.
- hiking socks – at least two pairs.
- quick-drying, comfortable underwear – at least 5 pairs.
- Ladies – a sports bra, if possible two.
- Men – compression shorts if you’re prone to chafing down there, remember you will be walking 6+ hours a day you definitely don’t want ire!
- a high SPF facial sunscreen, we used the Zinka Stick type as it is really long-lasting and doesn’t sweat off. We recommend an SPF of 50 or higher if you can get it, even if it’s cloudy the sun is very strong and the wind can burn your face too.
Tip: Don’t forget to put sunscreen on the backs of your ears – mine got burnt one day-ouch!
- basic toiletries like deodorant and moisturisers, as well as feminine hygiene products, wet wipes, toilet paper and lip balm. We find Carmex to be the best in harsh weather conditions.
- a muffler/neck warmer which will be mainly used to protect your face from the wind, but can also be used as a hat or a headband. Definitely, an extremely useful piece of gear.
- a sleeping bag is essential – women seem to need 4 season sleeping bags and men, 3 season sleeping bags. (Jealous of men and their naturally warmer body temperature!).
- a sleeping bag liner – preferably silk, which is more expensive but silk is the best material to keep out bed bugs, needs to be washed less frequently, dries quickly, insulates in cold weather and is breathable in warmer conditions.
- a down jacket for the evenings – us girls also rented down jackets for sitting around in the evenings, but we never wore them hiking.
- a money belt for cash, your passport, conservation permit and TIMS.
- a durable water bottle, we love the Nalgene water bottle with the narrow mouth and water purification drops or tablets.
- a basic first aid kit with plasters, an anti-blister stick, a mixed pack of blister plasters like Compeed, in case you get any blisters on your feet, painkillers, antibiotics for potential stomach upsets or infections and Diamox tablets for altitude sickness. You’ll find all of these over the counter in Kathmandu.
- a good headlamp is essential for very early starts or at night to go to the loo in the teahouse when the generator is off, as unpleasant as it is getting out of your sleeping bag in the dead of night if you’ve got to go, you’ve got to go, so you’ll need to be able to see what you’re doing – hands-free!
- a quick-drying towel.
- a deck of cards, a book or kindle, a notebook and a pen.
- an up to date map of the region and a guidebook.
- a comfortable change of clothes for the evening. Trust me, you’re going to want to get out of your sweaty hiking gear for a bit!
- a decent camera or smartphone with chargers and/or spare batteries to capture all the amazing sights you’ll see along the trek!
Tip: Bring flip-flops to let your tired feet breathe in the evening. We love Ipanema flip flops for both men and women as they are made from 100 per cent recyclable PVC, they are really flexible and durable, they can get wet without becoming soggy and dry off quickly so can be worn in the shower. The women’s “Ana” range have an anatomic footbed which is super comfortable! They’ve been our flip-flops of choice since we first discovered them in 2008!
Optional: Something to sleep in. I’m pyjama obsessed but couldn’t spare/justify the space in my backpack so I usually wore a long-sleeved top and leggings at night which were part of my change of clothes for the evening. Brian slept as he normally does in boxer shorts – even at the highest, coldest point. (He is definitely part wolf!)
You can rent or buy all of these from Shona’s store mentioned above if you don’t want to buy them. I rented a small backpack, a sleeping bag and a down jacket for the grand total of less than €2 per day. I’m sure his rates have gone up a bit since 2012 but even if they’ve doubled it’s still minimal.
A change of clothes for the evening is nice to feel comfy and wet wipes will become your best friend! Bear in mind that whatever you bring you’ll have to carry on your back every day so that should make you eager to keep your weight to a minimum. I think my backpack started off at 10kgs and at the end (when the snacks were gone) it was 8kgs. Brian’s was more at 12kgs as he had the camera, spare batteries and he carried my sleeping bag too – what a gent!
Water And Snacks
We chose to bring Nalgene water bottles we bought at Shona’s and iodine tablets to cut down on costs as bottled water gets expensive the higher you go as it has to be carried up. We also bought some snacks like dark chocolate, granola bars and trail mix in Shop Right Supermarket in Kathmandu and carried them with us as once you are at a high altitude your metabolism revs up and you will pay €5 (expensive for anywhere, insane for Nepal!) for that Snickers bar or €5 for a plate of chips! (Did it – #sorrynotsorry!)
Did I mention that you can eat whatever you like with no consequences at high altitude and you’re walking carrying 8-10kgs for 8 hours a day? It’s great! #TheEverestDiet
Is It Dangerous? Dealing With Altitude
As with anything in nature, it can be dangerous – even driving a car or crossing the road can be dangerous on any given (unlucky) day but if you pay attention to the weather, nature and your body and follow all the safety precautions you should have no problems.
That being said you should be very aware of High Altitude Sickness (HAS). Anything above 3,000m is considered a risk for HAS and the height of Everest Base Camp is 5,380m, so you’ll spend a significant amount of your hike within a 3,000m – 5,550m altitude. There are acclimatisation days built into the schedule in Namche and Pheriche where your body adjusts to the altitude before you go higher. You should definitely take these acclimatisation days! There is also another optional acclimatisation day in Dughla, which we chose to take also.
Some signs and symptoms of HAS include headaches, difficulty sleeping, breathlessness, loss of appetite, nausea and general tiredness. Some symptoms are less serious than others (like HAFE: High Altitude Flatulence Emission- it’s real, really!) but seriously, if you feel unwell it is advised to get to a lower altitude as soon as possible.
Our Tips For Avoiding Altitude Sickness On The EBC Trek
Our tips are to go slowly and not hike to high or too fast in one day. The general rule is not to ascend more than 400m in one day. Another rule is “Hike high, sleep low”, so if you pass a higher point on your hike that day from where you’ll sleep you should be all good. On the acclimatisation days, you should hike to a higher point that day to help your body adjust. The local cure of garlic soup can help with headaches and altitude symptoms. It might sound horrible but it’s really nice… if you like garlic and more importantly, it’s effective. Some people bring Diamox tablets to help with altitude sickness but if you can manage without taking them you’re better off but it’s still advisable to bring them.
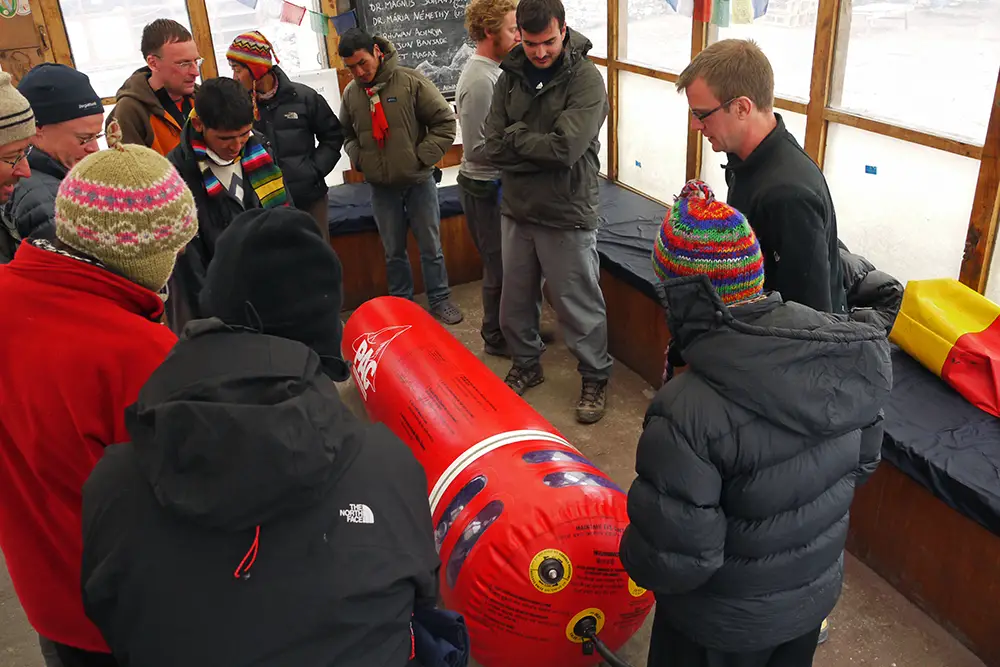
The Himalayan Rescue Association has an aid post in Pheriche run by volunteer doctors from around the globe. They give daily talks and demonstrations about altitude sickness and it’s believed to be the highest hospital in the world!
Do You Need Travel Insurance?
While it’s obviously not a legal requirement to complete the trek, you may feel a little more at ease if you have a travel insurance policy that covers the most dreaded, and most expensive, eventuality – helicopter evacuation.
If you do need emergency helicopter evacuation on the trail and you don’t have insurance that covers this, it can cost up to $5,000, not including your medical expenses, which can bump the final bill up to $10,000. If you don’t have a travel insurance policy, this needs to be paid upfront before the helicopter will be dispatched. So you’d have to trek with a credit card with a limit of at least $10,000 on you or have someone on speed dial willing to wire you that amount at any moment!
Or you could just take out some travel insurance for the trek for peace of mind.
We recommend World Nomads.
They are one of the few travel insurance companies to offer reasonably priced policies with coverage for activities such as hiking/trekking at heights of up to 6,000 metres on recognised routes, with a $625 excess for helicopter evacuation in Nepal. Be sure to read all the terms and conditions of your policy to be sure. You can even take out the insurance with them if you’re already on the road or just for the period of time you’ll be trekking.
What To Expect On The Everest Base Camp Trek
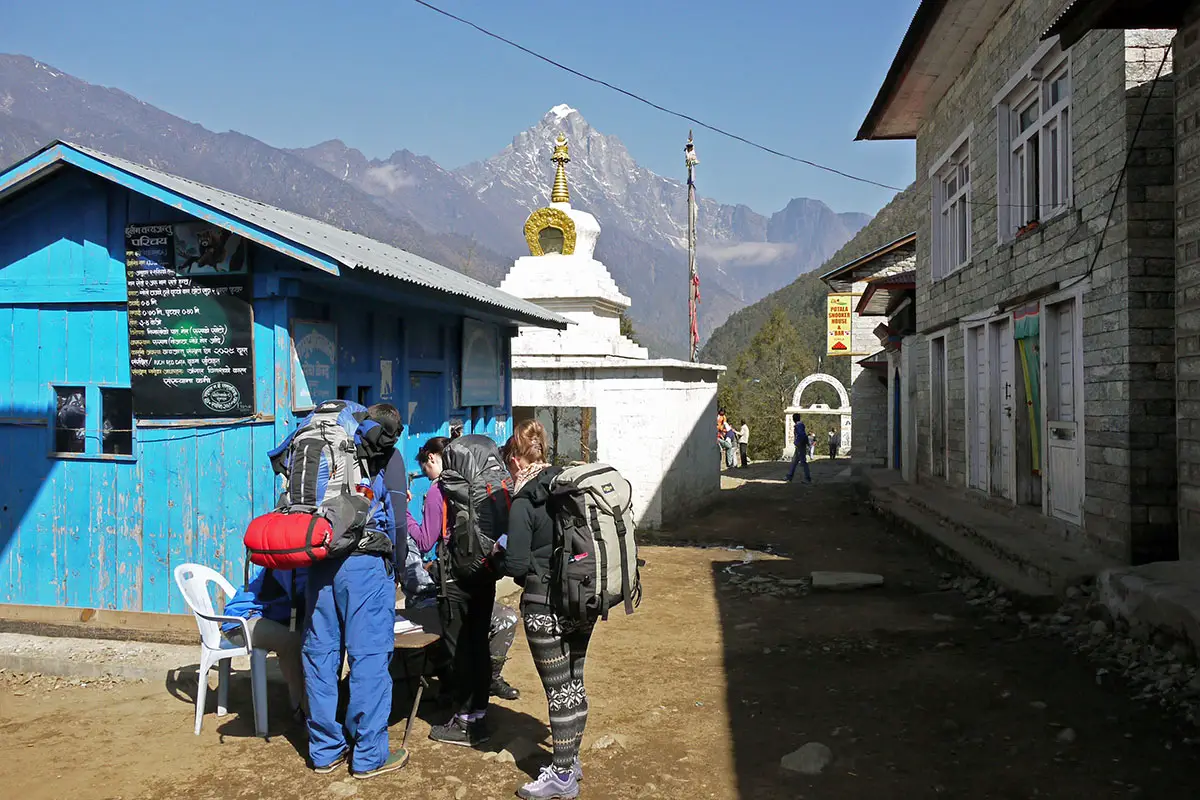
Teahouse Accommodation On The Everest Base Camp Trek

Everest Base Camp is a teahouse trek which means that there is accommodation along the way as these routes are the only way for the people who live in the Khumbu region to get from A to B. Most teahouses offer basic double occupancy rooms for 100 Rupees (€1) per person per night. It is then expected that you’ll eat all your meals at their teahouse for getting your bed so cheap. Toilets and bathroom facilities will be communal and basic.
There will also be a communal living room area which has a stove where everyone will eat their meals and relax in the evening as this is the only heated space. (Keep an eye out for what they use to fuel the fire!) Each village or stopping point has a few teahouses. As we were early in the second peak season we never had to worry about not getting a bed for the night and often had time to check out all teahouses and choose our favourite. We have heard that in the higher seasons people get their guides to book ahead or leave really early to get a bed. They will squeeze you into the common area if all comes to all. I assume prices of beds go up in the higher seasons and they can go up at higher altitudes too. We may have paid 200Rs (€2) per person in Gokyo but this is off the main Everest Base Camp trail and so receives fewer trekkers.
Update: I have heard reports of the teahouses now charging 200Rs and going up to 300Rs higher up on the trail around Lobuche and even 500Rs at Gorak Shep and Gokyo. This could have been in peak season so it might be different from our experience. In late 2018 a new 500Rs minimum charge was introduced after Namche Bazaar. As of the 2020 season so far, this minimum charge was only randomly being enforced. If you are on a package trek with a guide this will not affect you. If you are trekking solo then it may affect you so be sure to get a receipt for any payment you make.
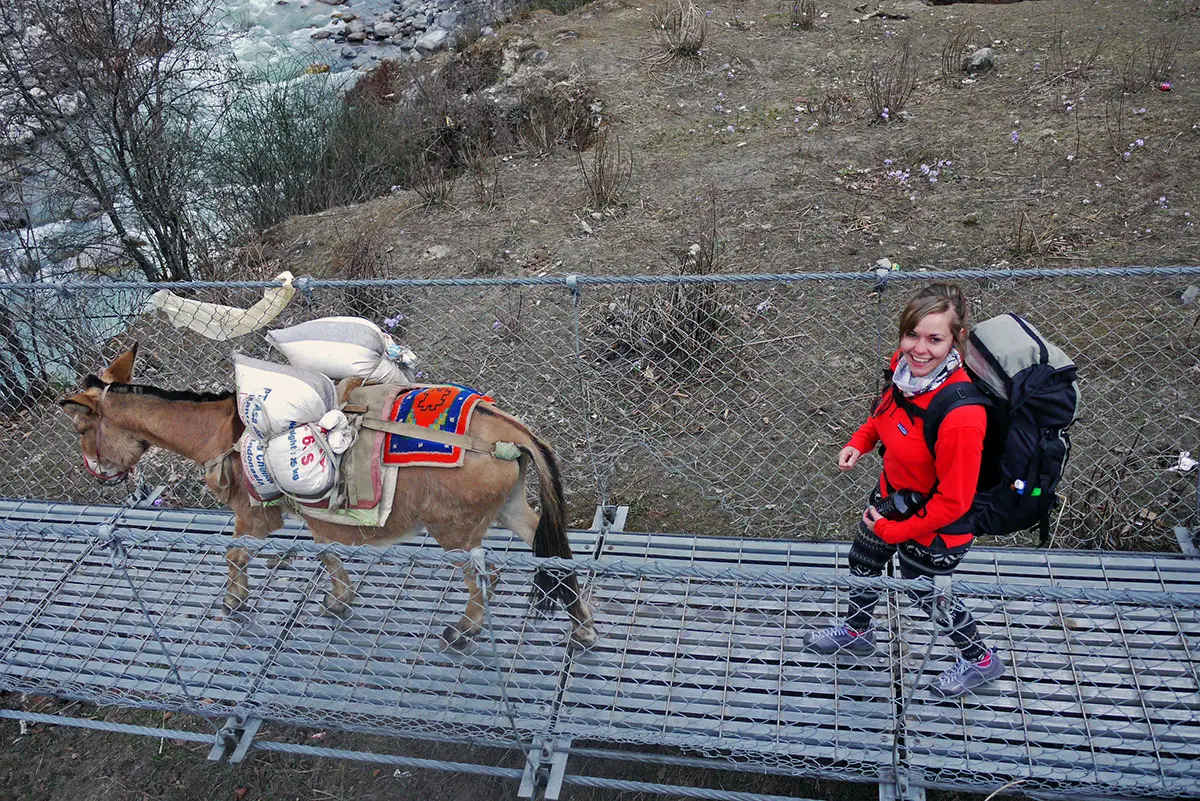
Walking
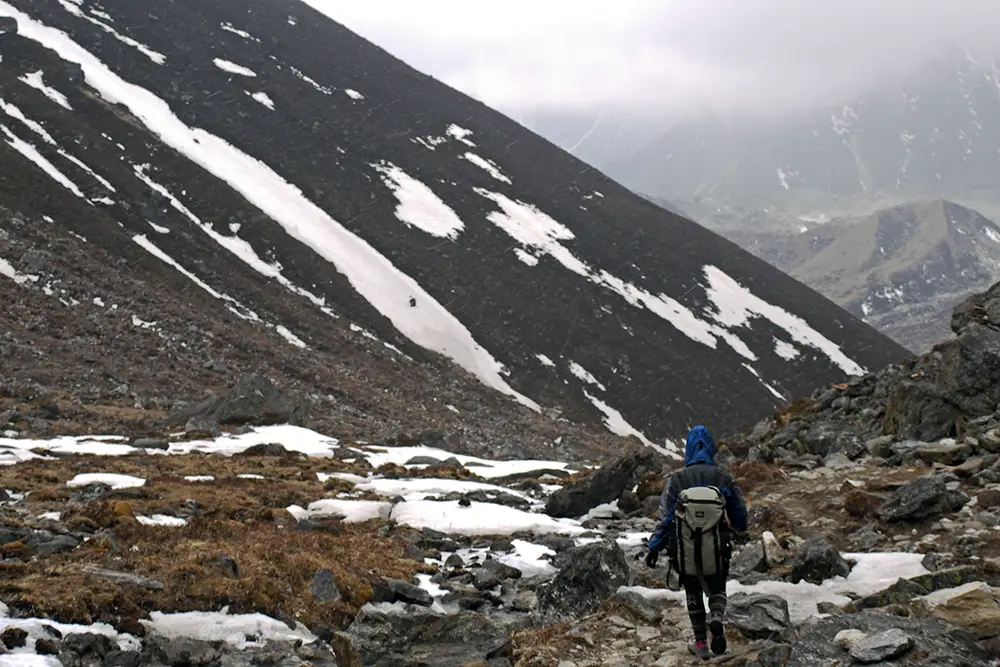
You will be walking for six to eight hours a day so be prepared – if you don’t like walking you might want to rethink this adventure! The distance covered each day is not huge due to the altitude involved and you have the acclimatisation days to rest up a bit. We found the Jiri to Lukla section to be the hardest as you are cutting up and down through the valleys instead of just ascending so it’s gruelling going up and down, up and down. With that said, the main trail is generally quite gradual and well-maintained.
Food And Facilities
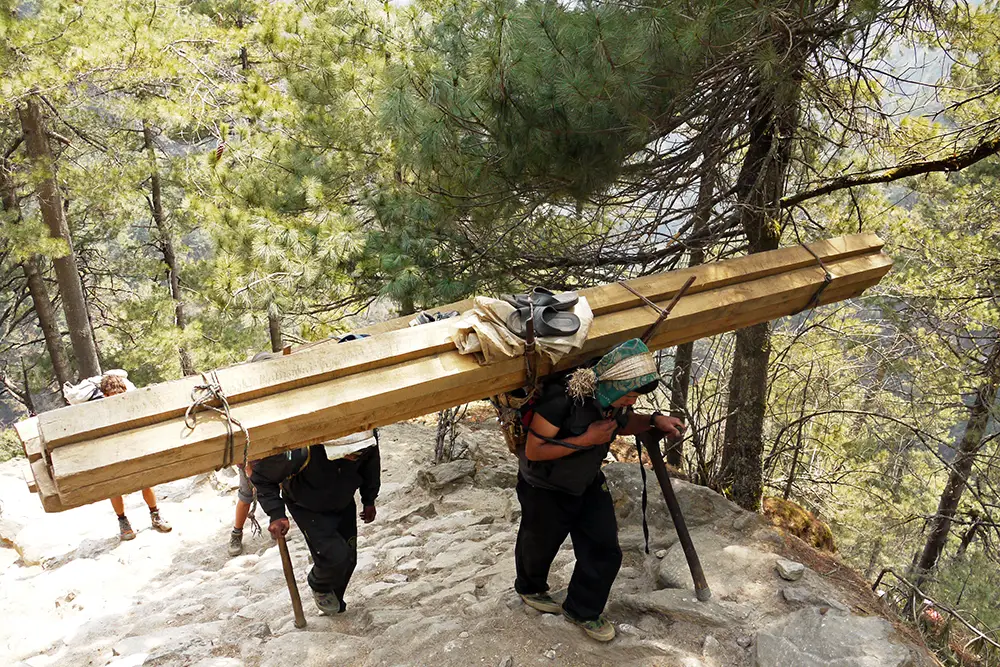
There is quite a selection of food on offer in the teahouses. You can have porridge or eggs and toast for breakfast, fried rice or chow mein for lunch and Dal Bhat or veg curry and rice for dinner. It’s a good idea to stick to veggie options after Namche as meat has to be carried up so it might not be the freshest. You can get Snickers, Mars and cans of Coke all the way if you want them. They also have Snickers rolls and Mars bar rolls, which are kind of like a chocolate bar in pastry – they’re heavy going but they are delicious! Things do however get steadily more expensive as you go higher. Eggs, potatoes and rice, in particular, get more expensive the higher you go as someone has to literally carry them up there.
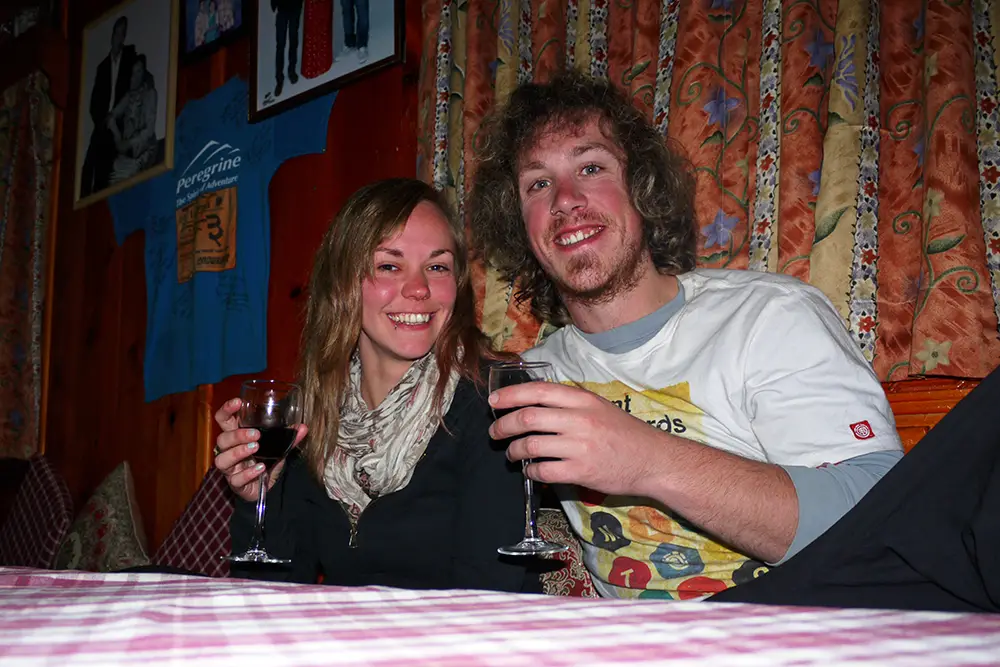
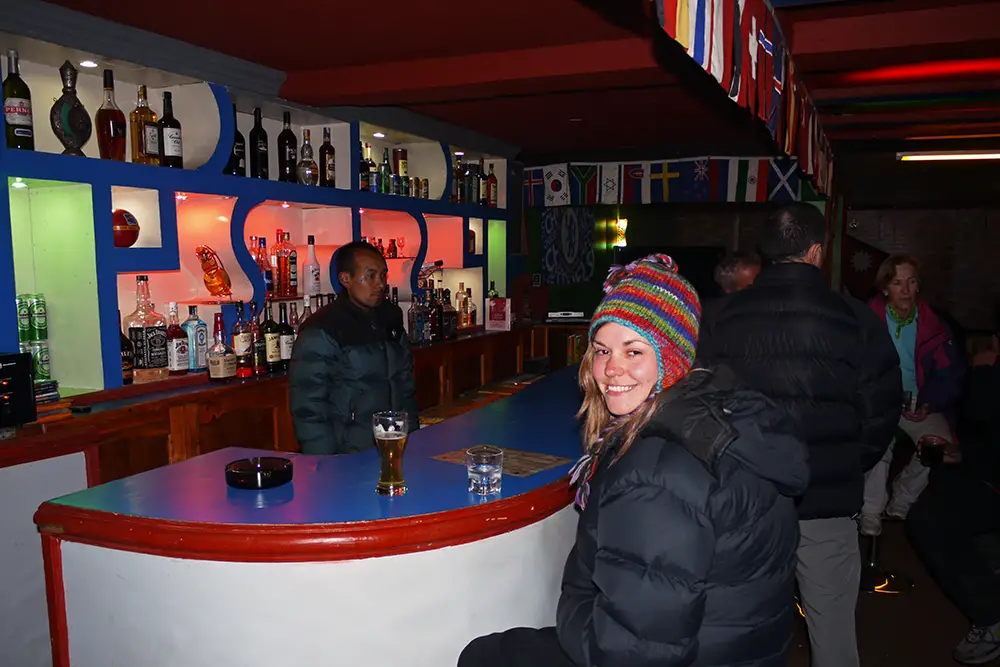
You can even get beers and rum on the trek. It’s not advised to drink on the ascent because it puts more stress on your body and can make you more susceptible to altitude sickness but on the descent, you can! We waited until we got back to Namche to have a celebratory drink in the highest Irish bar in the world (not Irish owned!). Other than that one drink, we didn’t drink on our hike at all, except for one wet miserable night in Paiya (Rum and black tea make a surprisingly nice combination!). And you can be sure we had a celebratory drink on our last night in Shivalaya!
Namche Bazaar is the last ‘big’ town on the trail and has everything you could need – a post office (apparently the highest in the world!), ATMs, chemist, cafes, restaurants and even bakeries where you can buy freshly made apple pie! There are also all kinds of souvenirs and trekking gear for sale so you can buy anything you forgot here. It’s two days walk from Lukla and eight from Jiri.
On the main trail, there was usually a small village between your night and lunch stops to grab a snack and a cup of tea and go to the loo. Off the main trail over towards Gokyo, the villages were more spread out so you had to have your own food and snacks. Also, be prepared for Asian squat toilets and some basic outhouse long-drop toilets on the trail. Sometimes you’ll just have to find a rock to pop a squat behind if nature calls!
Water
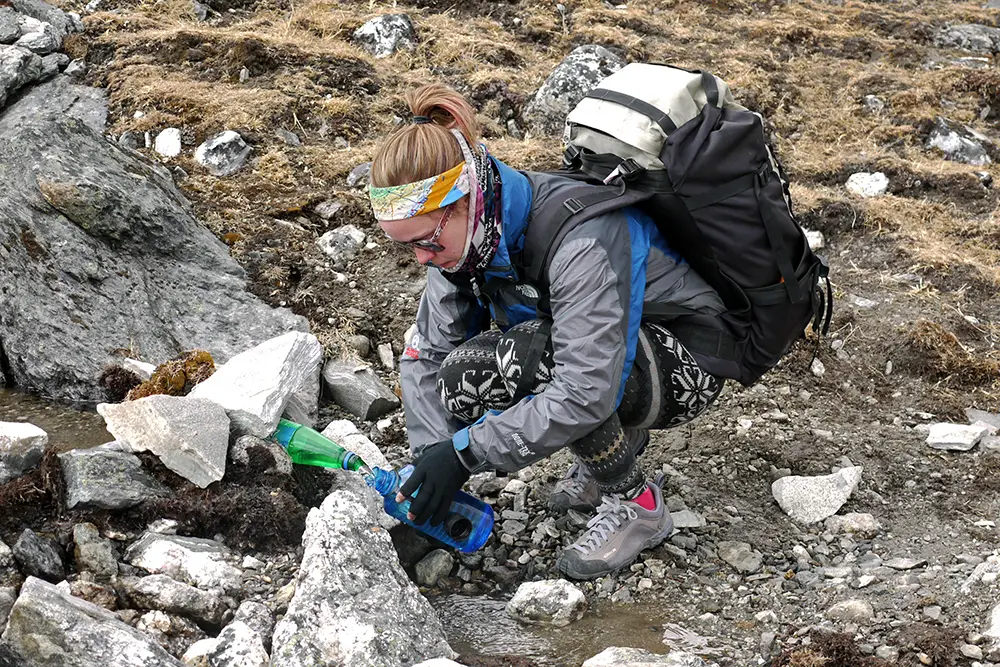
You can buy bottled water all the way on the trek but again, it starts to get quite expensive the higher you go as someone has to carry it up there. It’s cheaper and much more environmentally friendly to carry a reusable water bottle. As mentioned earlier, we were on a budget and on Andy’s advice, we chose to buy Nalgene water bottles in Kathmandu and used iodine drops and iodine tablets to purify water collected from streams along the way. Higher than Lukla this is advisable, however, lower than Lukla, not so much. You can still do this but there is more chance of contaminants in the water at lower altitudes with more animals and people around.
Be aware that iodine doesn’t kill everything and we both got bugs after Lukla. Giardiasis we think – it was not fun walking with this! Also, we think that after nearly three weeks the iodine maybe started to have an effect on our bodies too.
Entertainment
Apart from Namche and at a stretch, Lukla, every village on the trail is pretty tiny and consists of just a couple of teahouses so you have to entertain yourself the old-fashioned ways – good old conversation, reading and playing cards did the trick for us.
Definitely, bring a deck of cards with you. Most evenings we were in bed at 9 because you’re so wrecked (and there’s not much to do anyway). You’re up the next day early to start your walk to get the most light out of the day and also, the bad weather generally comes in later in the day.
Teahouses generally don’t have TV’s and we didn’t carry laptops with us on the trek. We also didn’t have smartphones at the time and didn’t bring and any electronics other than our cameras. I’m sure if we did it again this would be different as we’d just have to share with our followers on SnapChat or Instagram along the way! But we loved the simplicity involved at the time. Eat breakfast – hike, eat lunch – hike, eat dinner – sleep, repeat!
Don’t forget to go out and look at the stars on a clear night, it will blow your mind – entertainment sorted!
Charging And Photo Storage
When we trekked to Everest Base Camp, you had to pay the teahouse to charge phones, camera batteries, laptops etc. I’m sure this is still the case. To save on costs, we had two extra batteries for our camera and saved the batteries by not looking back over our pictures in the evening. We didn’t have to charge our batteries once. In addition to this, we brought multiple SD cards for our camera to store our photos on. Whatever you choose to do, be sure to have your camera ready as you will get some amazing photos on the Everest Base Camp trek.
First Aid
It’s important to bring some basic first aid supplies like plasters and some disinfectant wipes or antibacterial cream with you. You can buy most medicines and antibiotics over the counter very cheaply in Nepal so bringing a few doses of broad-spectrum antibiotics for things like stomach bugs, traveller’s diarrhoea or chest infections is a good idea. Compeed plasters are also a very good idea as you’ll more than likely develop at least one blister on the way. Hand sanitiser is also very handy for those calls of nature in the wilderness. Oh, and that reminds me, bring toilet paper too!
Tip: Toilet paper, wet wipes and hand sanitiser are essential items!
Wifi / Internet

There were internet cafés in most villages on the way up – even in Gorak Shep! It was quite expensive though I think €0.10 per minute before Namche and €0.25 per minute after. There was free wifi in cafes in Lukla and the last of the free wifi was in Namche Baazar. We didn’t use the internet anywhere along the trail, so I have no idea about how good or bad it was.
We survived 23 days off the grid – seems hard to imagine now with our online work but we loved it; totally disconnected, immersed in nature and that’s what this is all about. We didn’t even see a motorised vehicle for 22 days – amazing! There’s also good mobile phone reception up there should you need it.
Certificate Of Completion
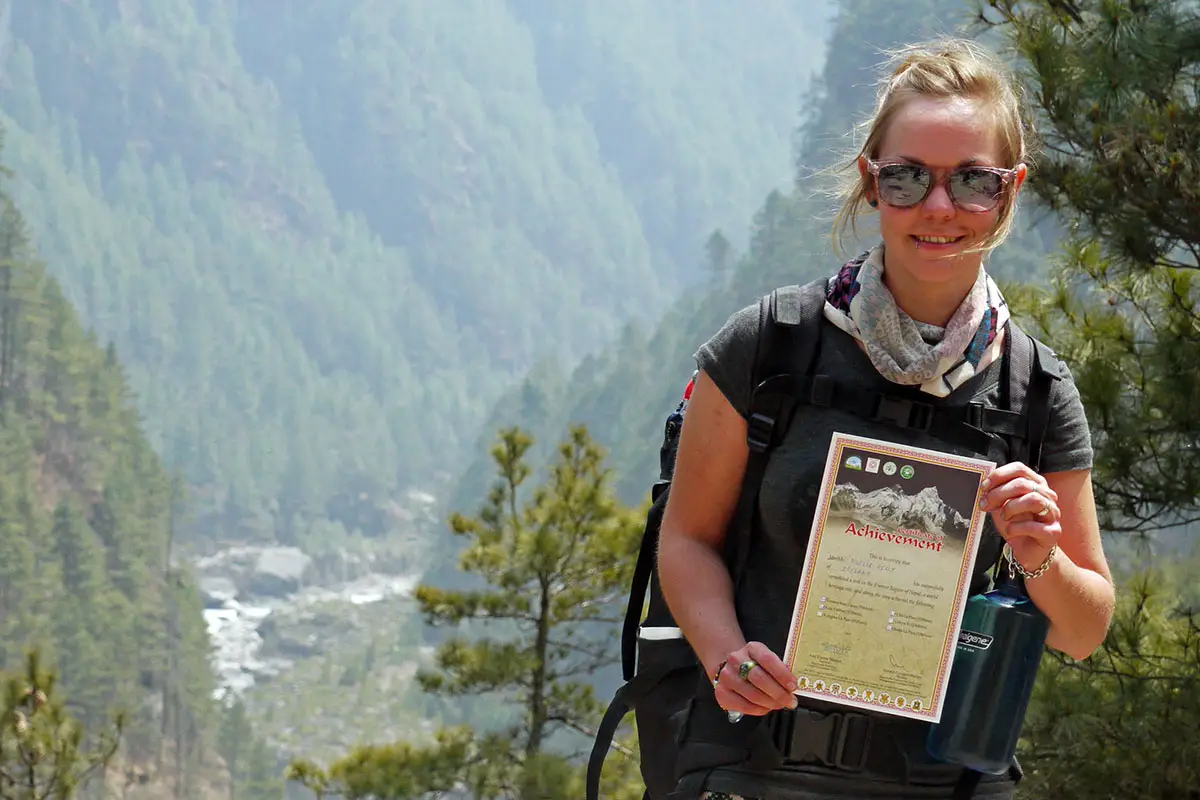
There is a little post outside of Namche on the Lukla side where you can buy a certificate of completion to say you reached Everest Base Camp. As far as I remember it cost 1,000 Rs. but I’m not sure and can’t find any info on it anywhere online. We bought the certificates anyway, even though there’s nothing to stop anyone from just going as far as Namche and buying the cert without going to Base Camp. Still, it’s a nice memento of the trek.
Our Exact Everest Base Camp Trek Itinerary
We spent 23 days trekking in total, choosing to add on the option of descending via Gokyo Lake while on the trail taking in two of the three passes in the region, Cho La and Renjo La. We also walked from Lukla out to Jiri rather than flying out of Lukla.
This is our exact itinerary:
Day 1: Lukla to Phakding
Day 2: Phakding to Namche
Day 3: Acclimatisation Day in Namche Bazaar
Read more: Everest Base Camp Trek: Day 1 to Day 3, Lukla to Namche Bazaar
Day 4: Namche to Tengboche
Day 5: Tengboche to Periche
Day 6: Acclimatisation Day in Periche
Read more: Everest Base Camp Trek: Day 4 to Day 6, Namche Bazaar to Periche
Day 7: Periche to Dughla
Day 8: Dughla to Lobouche
Day 9: Lobouche to Gorak Shep to EBC
Read more: Everest Base Camp Trek: Day 7 to Day 9, Periche to Everest Base Camp
Day 10: Gorak Shep to Kala Pattar to Dzongla (Read more)
Day 11: Dzongla to Dragnag (via the Cho La Pass) (Read more)
Day 12: Dragnag to Gokyo
Day 13: Gokyo to Lumde (via the Renjo La pass)
Day 14: Lumde to Namche Bazaar
Read more: Everest Base Camp Trek: Day 12 to Day 14, Dragnag to Namche Bazaar (via Renjo La Pass)
Day 15: Namche Bazaar to Lukla
Day 16: Lukla to Paiya
Day 17: Paiya to Karikhola
Read more: Everest Base Camp Trek: Day 15 to Day 17, Namche Bazaar to Karikhola
Day 18: Karikhola to Taksindu Pass
Day 19: Taksindu-La to Junbesi
Day 20: Junbesi to Kinja
Read more: Everest Base Camp Trek: Day 18 to Day 20, Karikhola to Kinja (via Taksindu Pass)
Day 21: Kinja to Bhandhar
Day 22: Bhandar to Shivalaya
Day 23: Shivalaya to Kathmandu
Read more: Everest Base Camp Trek: Day 21 to Day 23, Kinja to Shivalaya and back to Kathmandu
Notably Hard Days
After Lukla, the trail mostly ascends gradually with two hard days of straight incline coming into Namche Bazaar and Tengboche. Apart from that, it’s pretty easy. Just a lot of walking. The only days that really stand out as particularly hard are coming into Namche and Tengboche because it’s so freaking steep.
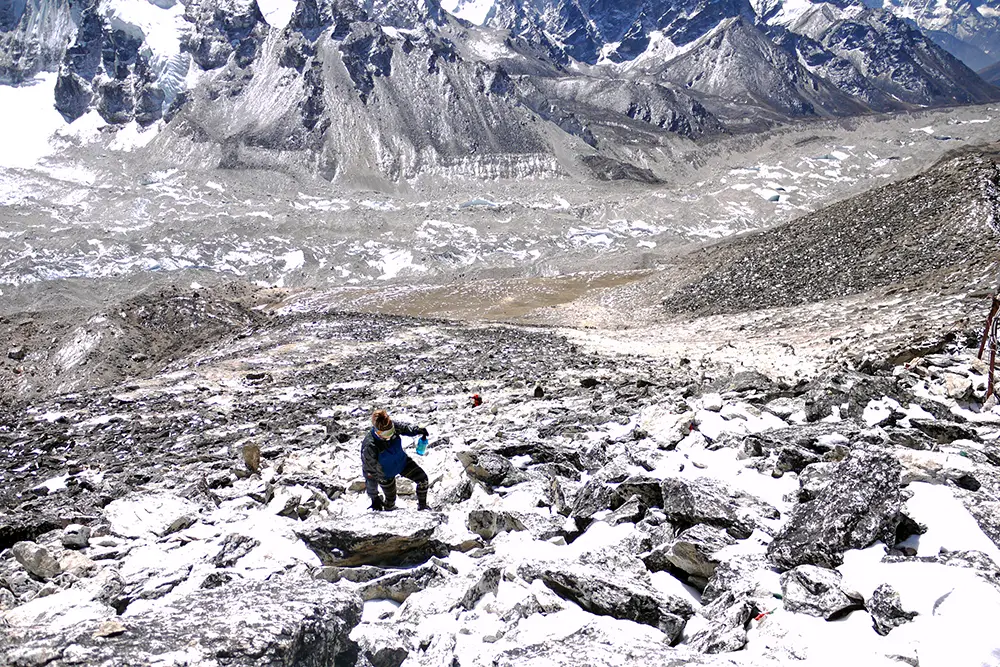
Also, the day we got to Everest Base Camp, we were so excited that we didn’t eat anything in Gorak Shep. We just dropped our bags, had a cup of tea and a tiny bit of chocolate and headed on not realising it was a two and a half hour walk. This was also a hard walk not because of the incline but because it involved constantly clambering up and down over boulders. Everyone else said they felt the altitude coming into play here and found it harder to breathe, but I personally didn’t notice a huge difference. As I have mild asthma, I joked that everyone was now experiencing how I breathe all the time!

Myself and Brian hung on and explored around the base camp for an hour walking up to the new base camp as well, checking out the tents and using the “facilities” (think hole in the rocks with a basic tent made from some tarp and wooden beams over it!) This was the highest altitude we had experienced to date and the trip back to Gorak Shep was a nightmare. We felt so weak and sick as we hadn’t eaten before setting off.
When we arrived back to the teahouse our friends Mike and Linda, who had headed back before us, thought we looked green in the face. We had no appetite either, despite the physical exertion. It was the only time I experienced any kind of altitude sickness. Brian had some headaches in Dughla and had taken painkillers and Diamox which helped. We both took them again in Gorak Shep and after forcing ourselves to eat some food, chilling by the fire in the teahouse and getting a good night’s rest we were good to go the next morning.
A Typical Day On The Everest Base Camp Trek
On a typical day on the trail, we usually woke up at 7 am, got dressed, packed up our backpack and had breakfast in the teahouse. We normally started walking from around 8 am, stopping somewhere to eat a snack mid-morning. Then we used to take a long lunch in a village along the way around 12 or 1 for about an hour and a half or two to rest up a bit. At lower altitudes, we loved to take off our shoes and give our feet a break. This was at the beginning, however, when we were at a lower altitude, so the days were warmer and our socks were fresher too!
We then used to walk on to our decided finishing point where we would arrive around 4 or 5. We’d freshen up (which involved what we lovingly started to call a “wet wipe shower”, a roll and spray of deodorant and some dry shampoo for my luscious locks) change into our one set of evening clothes, wooly socks and flip-flops and hang out in the teahouse common room, eat dinner, drink tea, chat and play cards.
Then it was always early to bed around 9:30 or 10 pm.
Our Highlights Of The Everest Base Camp Trek
Flying Into Lukla Airport
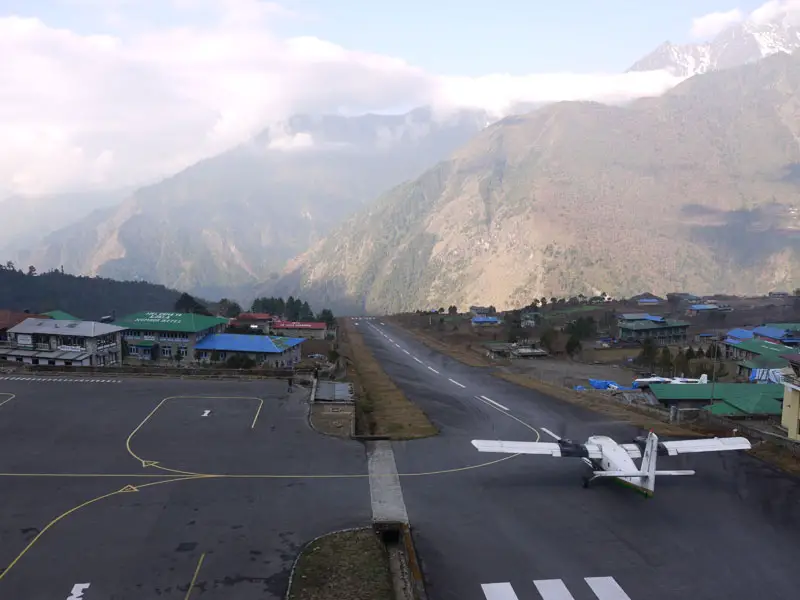
Flying into Lukla is a once in a lifetime experience in itself! Even if you don’t fly in our out of Lukla, take a wander around and look at the runway and “airport” there. If you have a fear of flying maybe don’t! The runway is very short and is inclined – the end of the runway is a sheer drop off the side of the mountain! Lukla itself has a few café’s and pubs – we saw a fake “Starbucks” and some Irish and Scottish pubs – I guess no one is checking copyright up here!
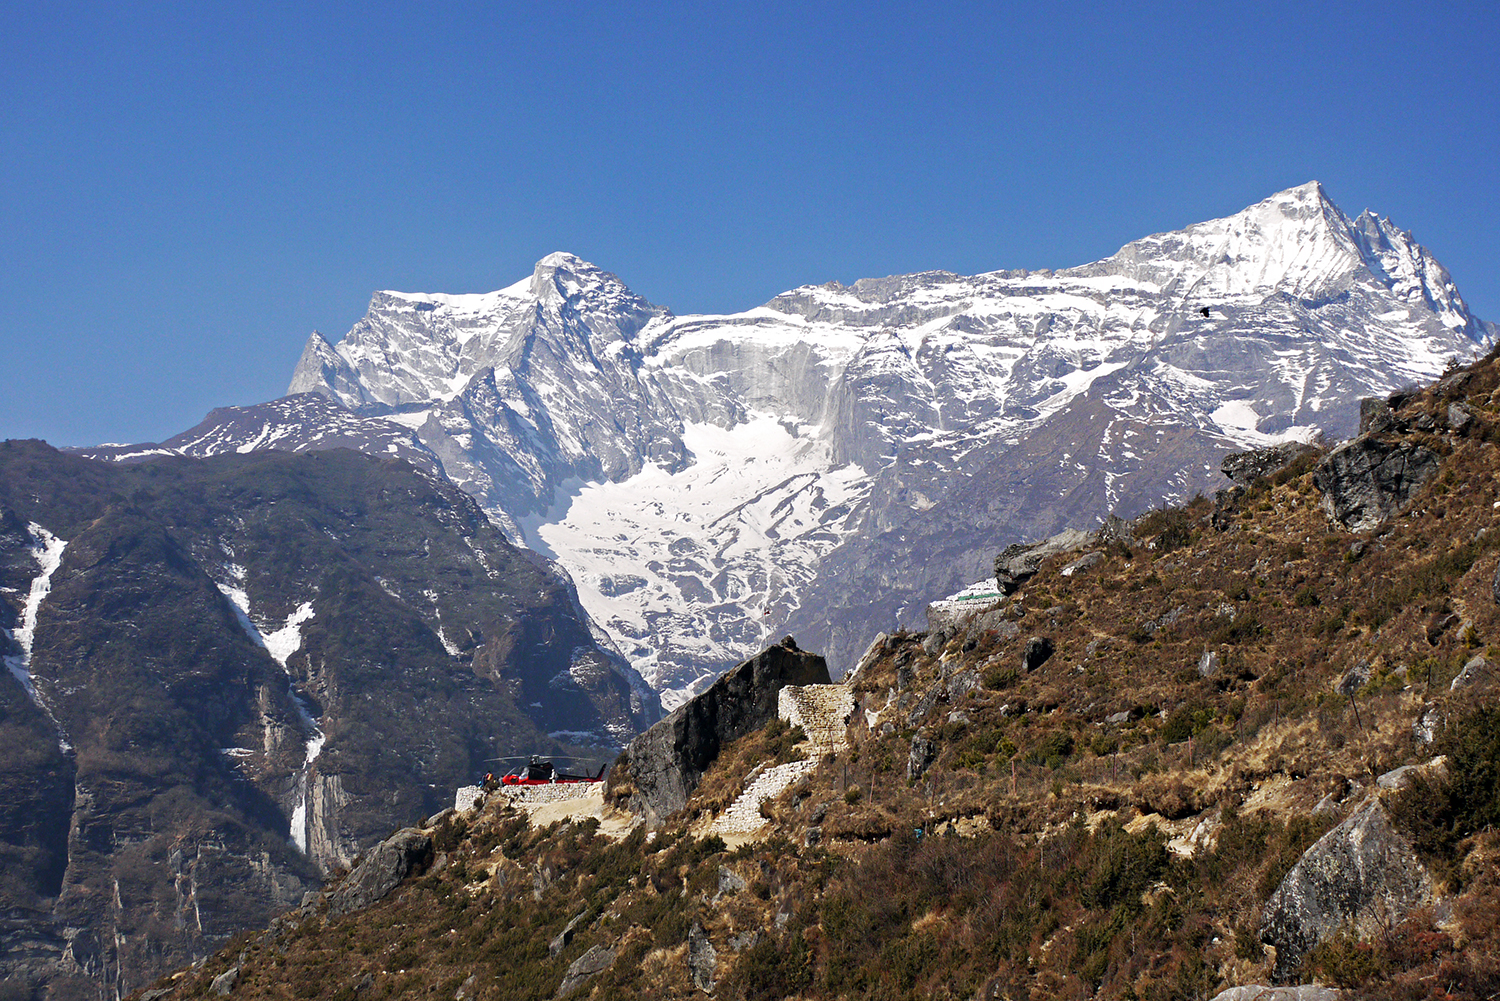
Acclimatising And Relaxing In Namche Bazaar
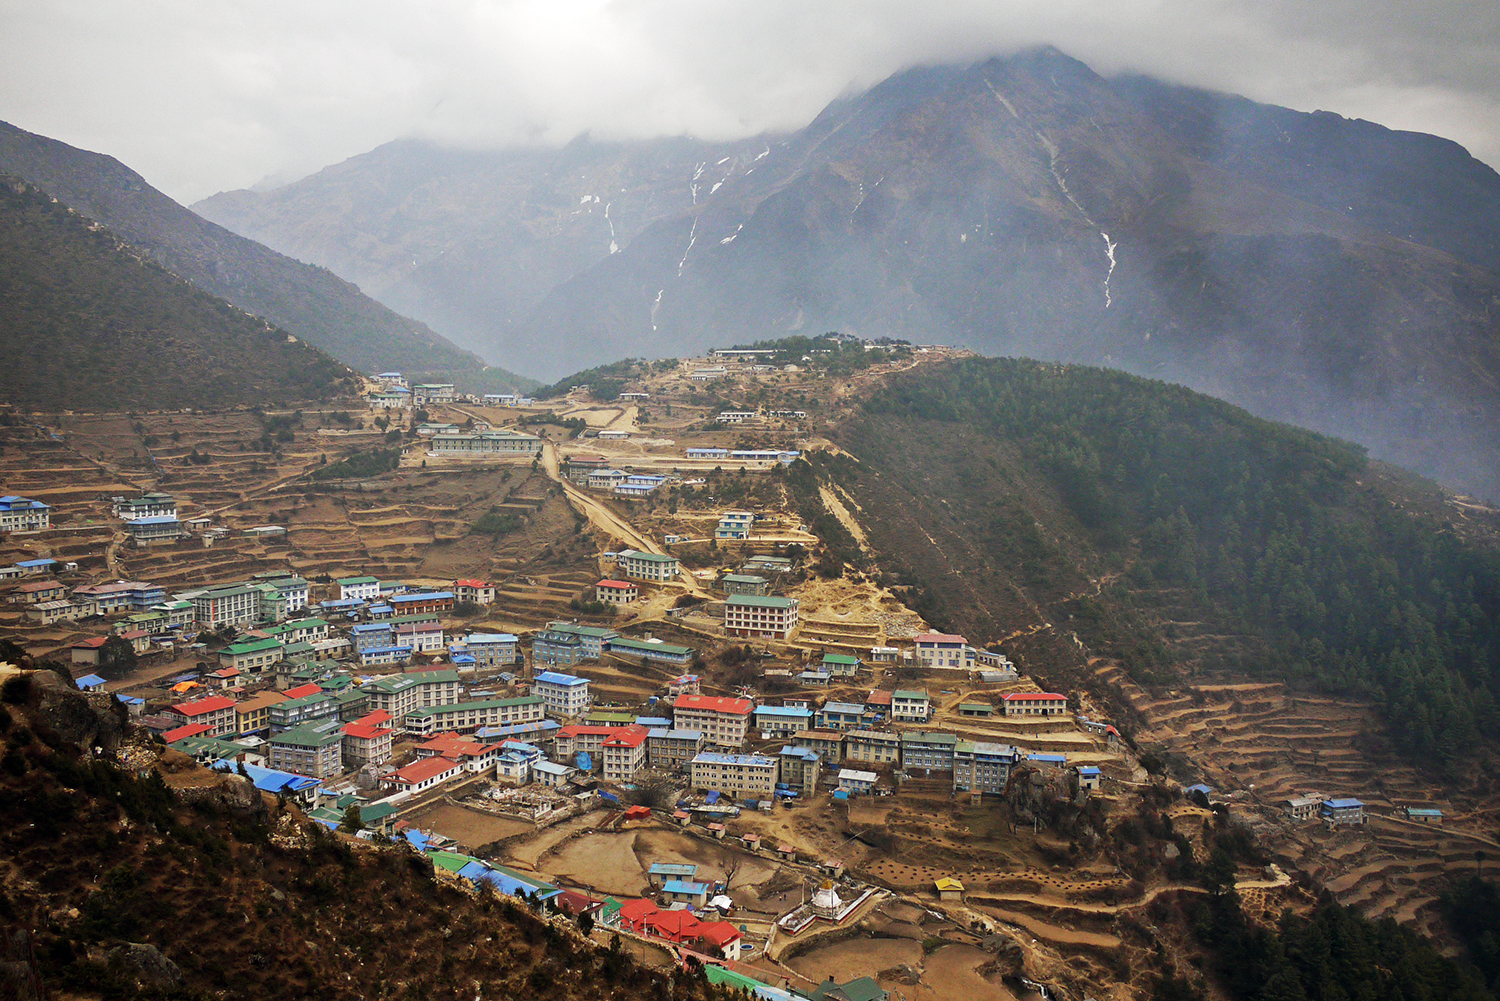
As I mentioned before, Namche is the last big town on the trail and has a lot of shops and cafes. Some people just hike as far as here for the first glimpse of Everest. It’s a short walk away and you can do some day hikes around the area. Syangboche airstrip is nearby where some people fly to begin the hike and some supplies get flown in here too. In nearby Khumjung is the Hillary school which was set up by Edmund Hillary in 1961 for the kids in the area.
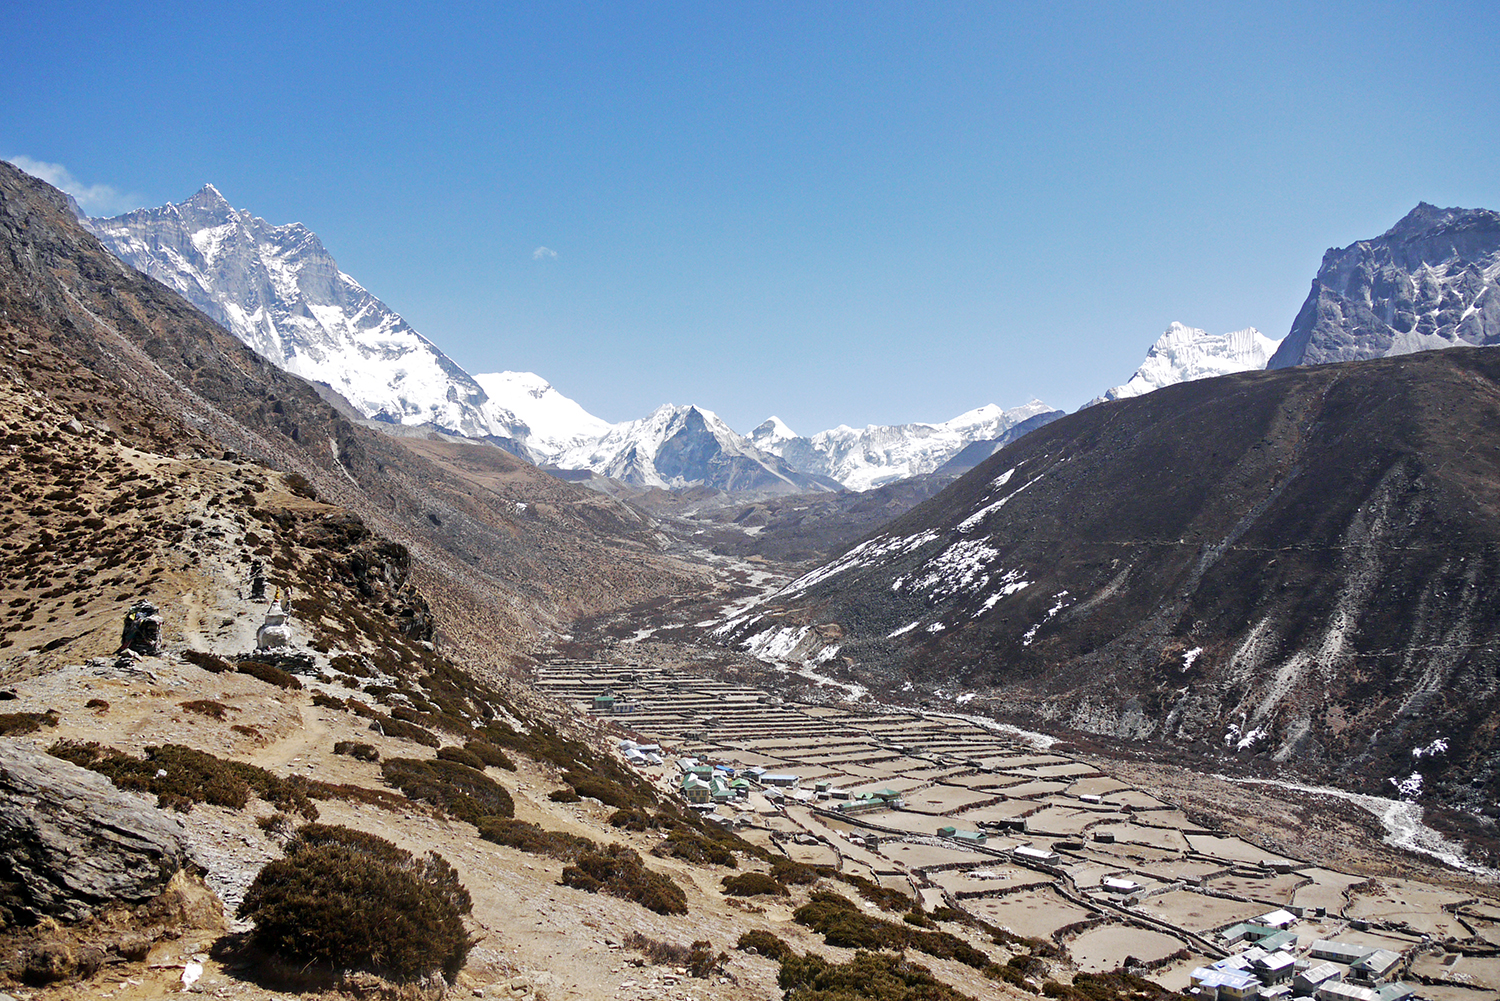
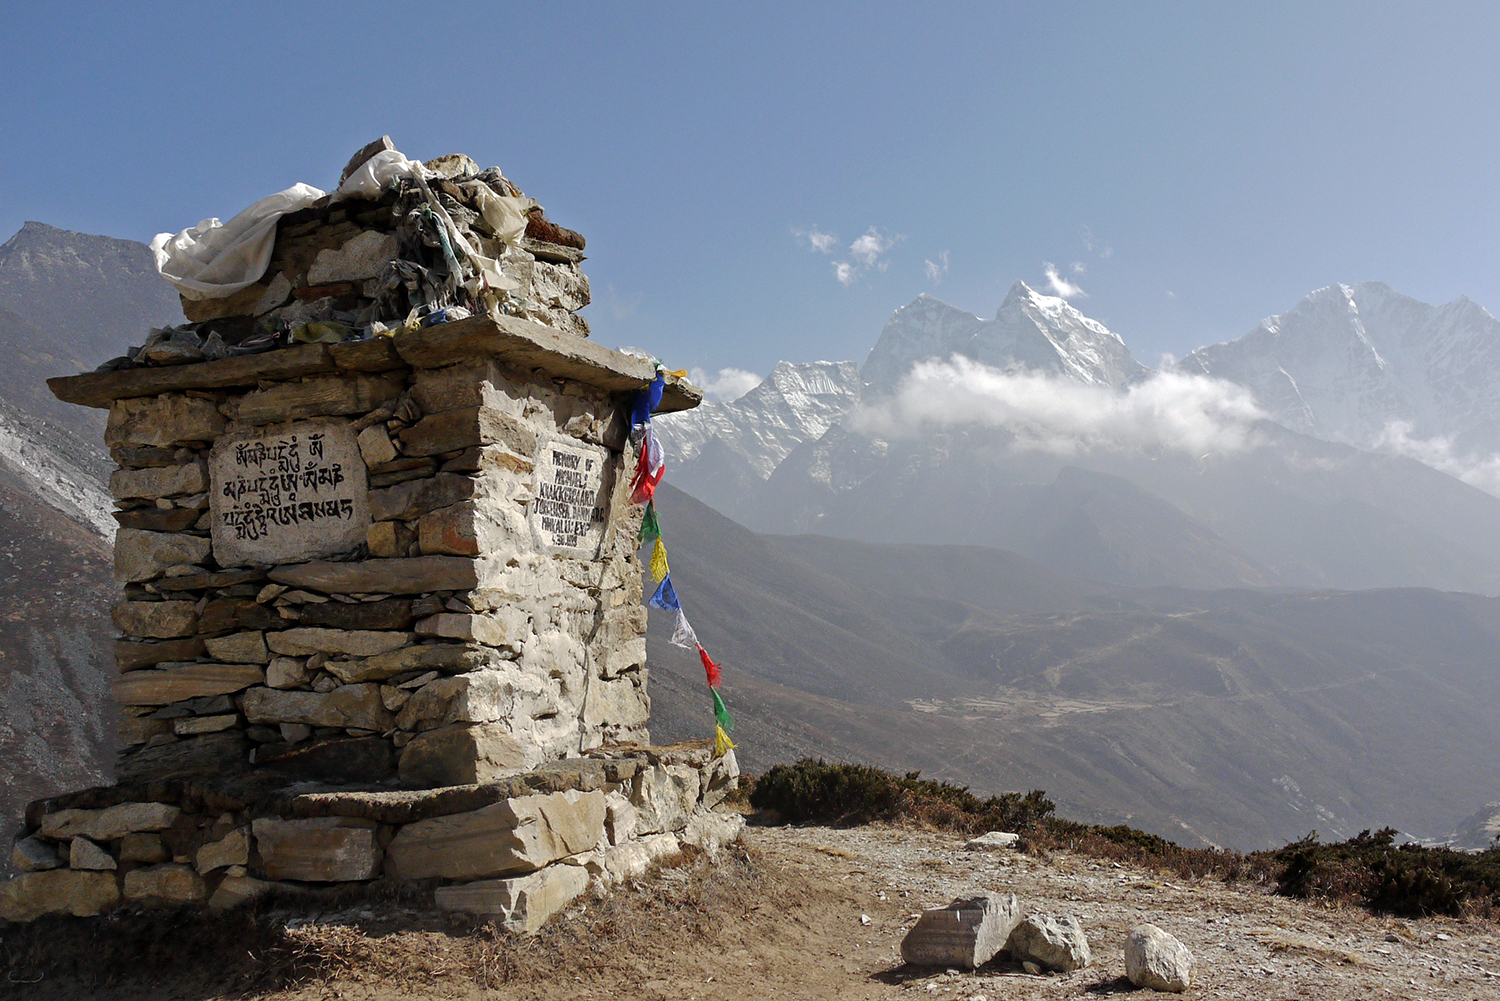
Soaking Up Spiritual Vibes And Views At Tengboche
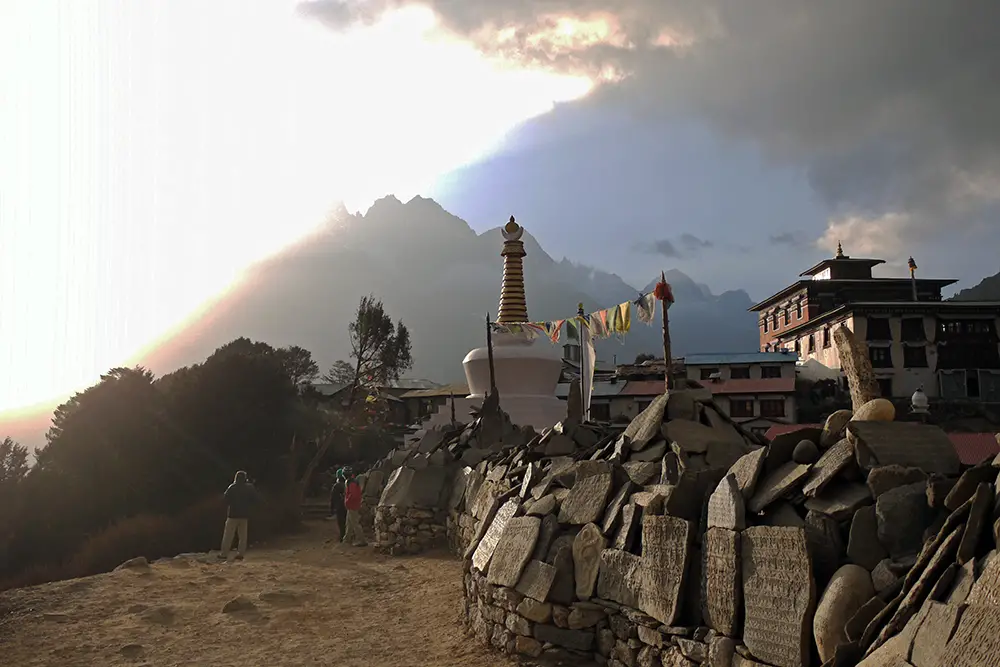
Tengboche is home to the famous Dawa Choling Gompa, the largest Gompa in the Khumbu region. Everest expeditionists usually visit this monastery to light candles and seek blessings from the gods for good health and safe mountaineering as it’s considered the gateway to Everest. The views of the Himalayas from here are incredible with Everest, Nuptse, Lhotse, Ama Dablam, Tawache, and Thamserku in panoramic view. John Hunt, the leader of Hillary’s Everest expedition in 1953 was one of the first mountaineers to visit the monastery and described Tengboche as “one of the most beautiful places in the world” and we agree.
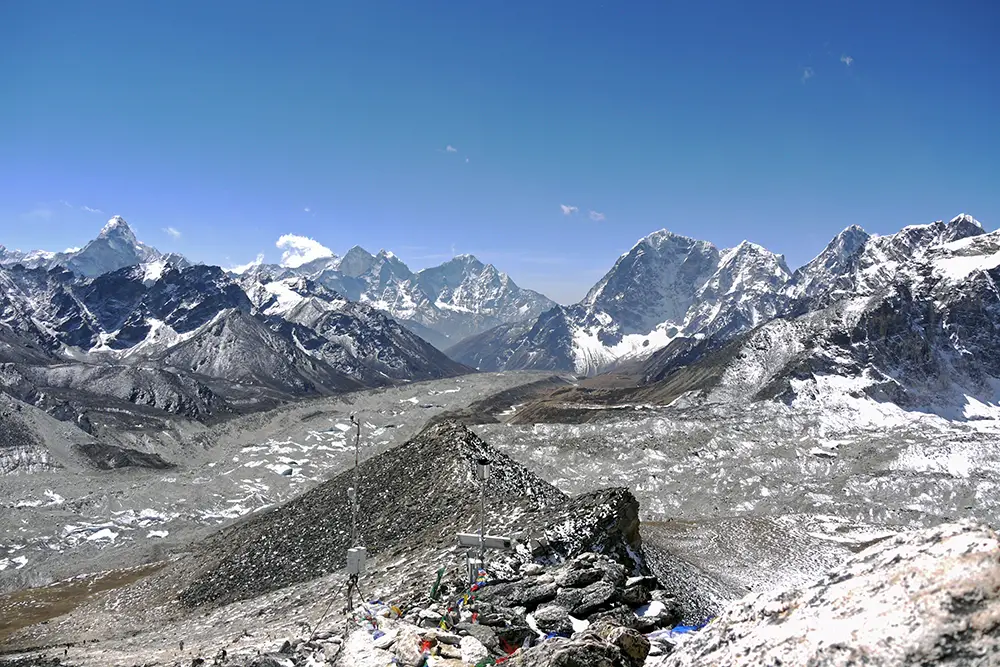
Panoramic Himalayan Views On Top Of Kala Pattar
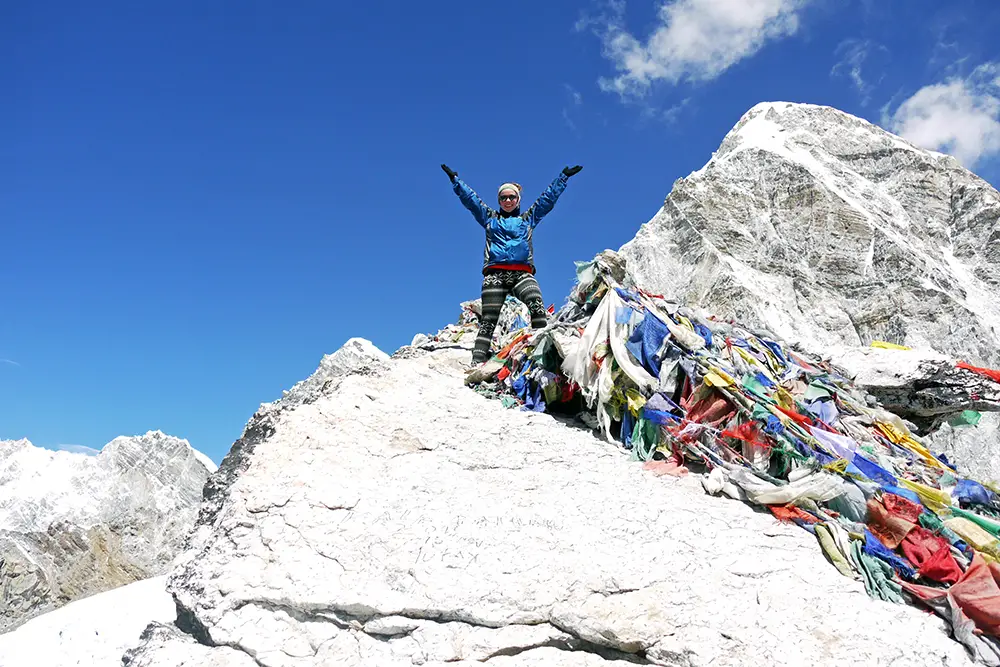
Kala Pattar was without a doubt the highlight of our trek. It may be called the Everest Base Camp trek but it should be called the Kala Pattar trek. The360 degree panoramas of Everest and the Himalayas from this peak are incredible. Keep going to the very top (5,550m) of the little craggy peak and stand in awe of your surroundings – it’s just incredible! From Everest Base Camp, you can’t actually see Mount Everest but from up here you sure can and it feels like you’re on top of the world.
Crossing The Cho La Pass (Optional)
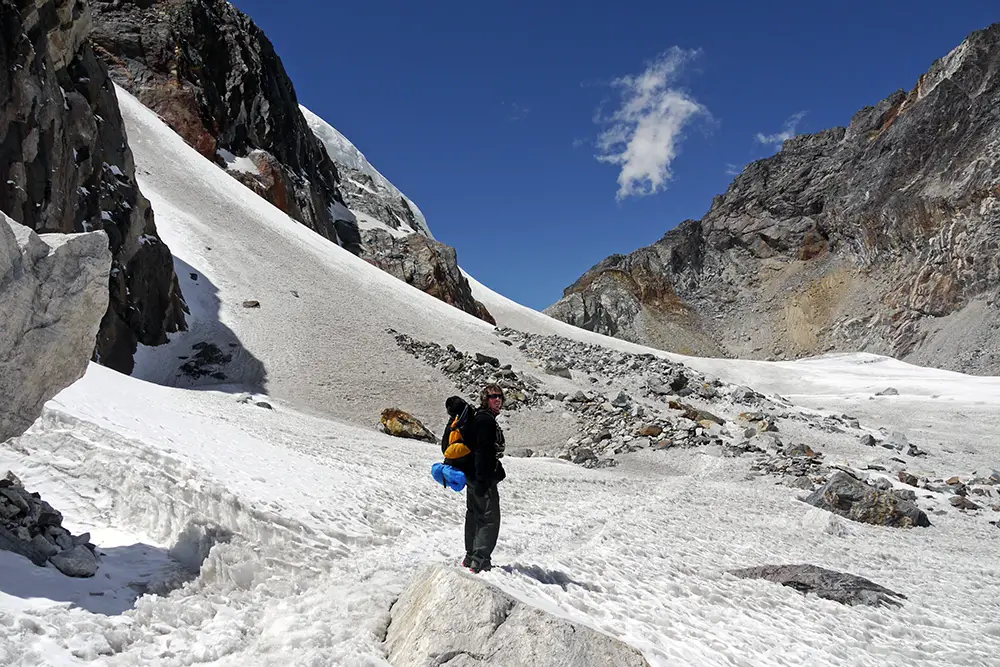
Still one of our greatest adventures to this day, the Cho La Pass is an optional alternative route up or down from Base Camp. We chose to add this on as we were enjoying the trek so much that we decided to extend our route to take in the stunning Gokyo Lake as well, which offers a different vantage point of Mt Everest. It’s considered the most difficult pass in the region and we can fully understand why. It’s difficult to see and find the trail on this part as it’s not part of the main trail. We used to look for holes in the ground from hiking poles to see if we were going the right way!
The Cho La pass itself is essentially a glacier and is has some crevasses in parts and either side of it is craggy rocky terrain. An early start is essential to avoid the sun melting the ground beneath you. It is advised to hire a guide for this part of the trail and in hindsight, we should have. You can hire a guide in Dzongla or Dragnag just to take you over the pass. Apart from the difficulty and fear factor involved, the scenery is breathtaking here!
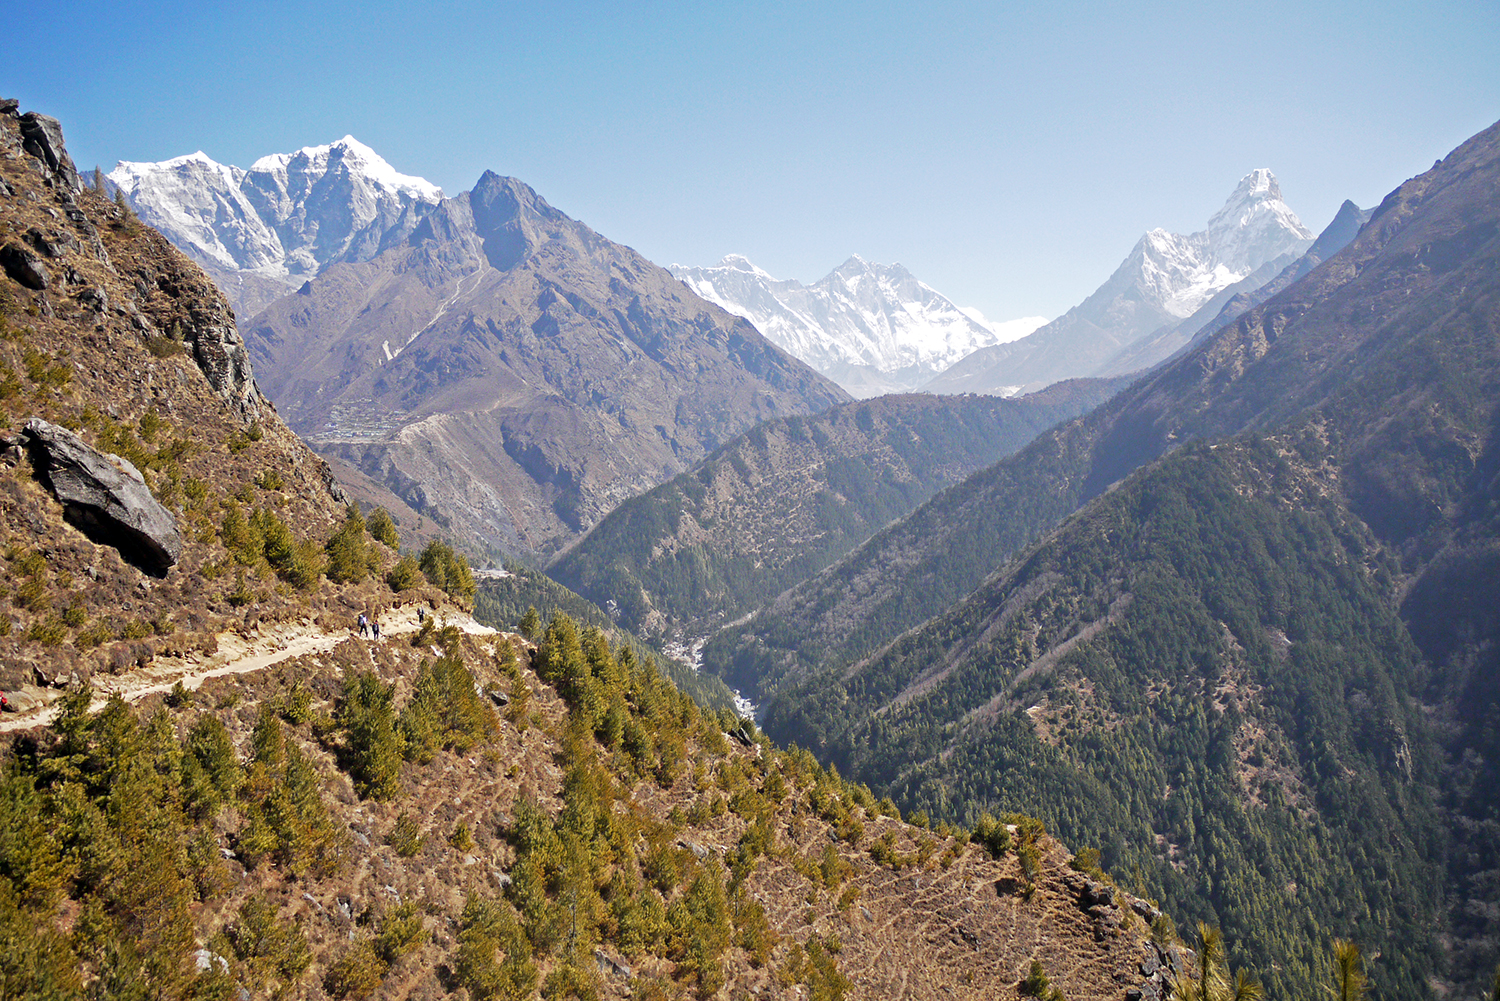
Walking Out Through The Valleys From Lukla To Jiri (Optional)
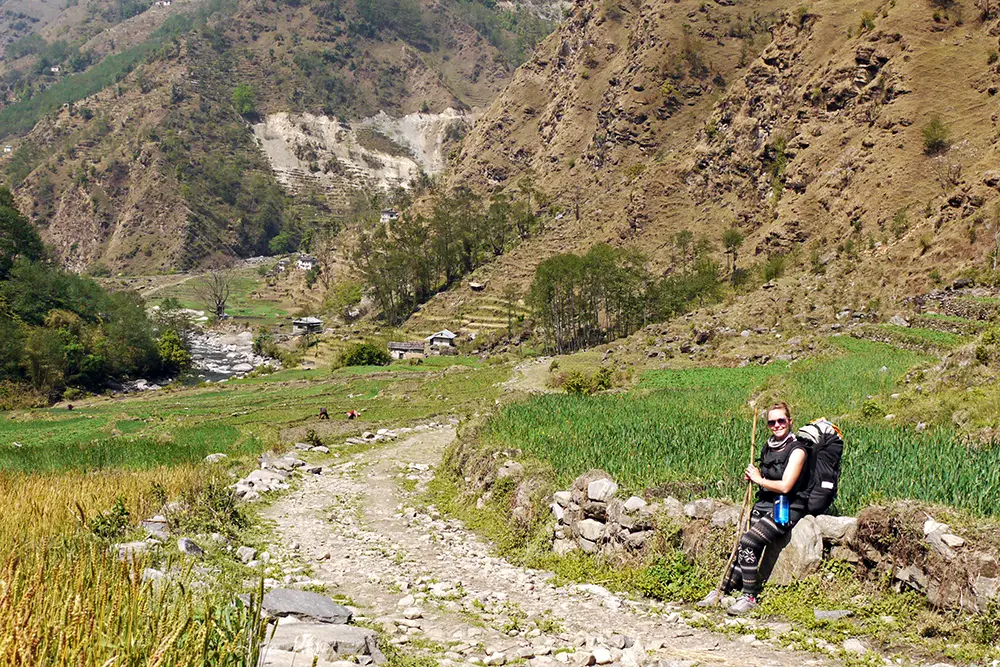
This part of the trail is the most physically challenging as you are cutting up and down through the valleys as opposed to a steady incline. We felt this was a very rewarding part of the trail as there are more people living in the area so there was more chance to interact with and meet locals. This section also feels a little less worn than the main trail, something which we always enjoy, but you don’t have the same incredible mountain views to pull you through the tough days.
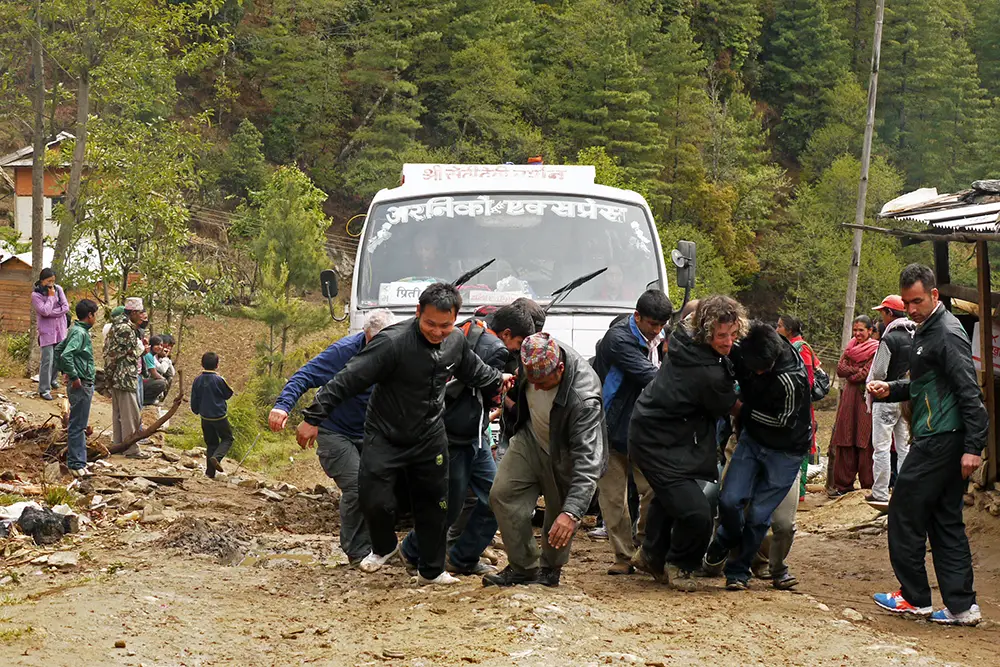
We met a local man one day with bandages all over his hands. Asking him what happened, he told us how he was walking home from the hospital in Kathmandu which involved a five-day walk and a 12-hour bus trip just to go to the hospital. And the same again to return – crazy!
So there you have it. A complete guide to everything you need to know about trekking to Everest Base Camp independently. Even if you choose to use a guide for this adventure, we hope you will find this guide useful. So go ahead and get your hiking shoes on and start planning. You won’t regret it, we promise!
Over To You – Have You Trekked To Everest Base Camp? Would You?
Anything else you’d like to know? Just hit us up in the comments below and we’ll try to help you as best we can.
Additionally, if you’ve recently completed this trek and have anything to add or have updates on any recent changes for fellow trekkers who want to do the Everest Base Camp trek independently, please feel free to leave a comment!
Happy trekking and namaste!
Pin It!
Noelle is a pescatarian foodie, travel junkie and a massive dog person. She’s a self-diagnosed chocoholic and loves tea, coffee and red wine. She also loves to do yoga and therefore is the sensible, grounded one in the relationship! Noelle loves to really get to grips with the culture of a country and the mindset of the people. She also enjoys picking up a few words in the local language wherever she is and, of course, sampling the local food!
Sign up for our free travel photography Ebook "Faces of Nepal" and you'll also receive our monthly newsletter.


Wonderful & very informative article. I think these tips and advice are much helpful. Great Sharing, Thank you for such detailed description of the destination. All the pictures are gorgeous. Excellent Explanation.
This is great information about Everest Base Camp Trek, For one who is planning to visit EBC, this blog will help them to prepare step by step so, this is like a mirror of Everest Base Camp, thank you for sharing such an informative article.
Well crafted article.
Hi,
Quick question regarding the flight from Kathmandu to Lukla. Were you able to book a relatively last minute flight while in Kathmandu? I’m sure it’s advisable to book a flight much farther in advance, however, I can’t plan so far ahead. I’ve heard you can go to travel agencies in the Thamal district and book a flight. Did you book relatively last minute? How was that process.
thank you for the informative post, will definitely comeback for more.
Thank you for all the time, effort and expense you invested into in your post. I read it all, including the Q&A at the end. It is helping me immensely. I arrived here in Ktm 3 weeks ago and had no inclination of going to EBC. That is until I was clearly inspired during my morning ‘quiet time’ to make the trek. I’m 65 years old with considerable alloys implanted in my body, from my cervical spine to my fibula and am a little hesitant, however resolved to do make the climb. As I write this, it is Nov. 4, 2021. Since I decided to make the trek, I’ve visited 4 Trekking Agencies in Thamel and your post far outreaches the needed information that I acquired by all 4 agencies put together. I just called Shona’s and it sounds like it is definitely under new management. I hope they are as good as the Griffiths sounded. My paramount reason for the trek is to make a declaration (Isaiah 40:9) in grafting in Tibet. I plan to make the trek soon. How necessary is it to read “Nepal, The Lonely Planet”? Thanks again.
Such a nice article about the world highest peak Mt Everest base camp trek. Thank you for sharing.
such an incredible blog, a Great destination, as always. Thank you so much for sharing your travel blog. keep sharing, your positivity is infectious.
Hiking to Everest Base Camp is one of the best in the World, thank you so much for sharing it
I have been so many times walking to the Everest base camp trek, I really likes the Himalayas, Glaciers, Landscape, Nature,
Can you tell how many mountains be seen in this trail… It would be nice if you provide the heights of the mountains also.
There are countless mountains to be seen on this trek as you’re in the Himalayas! We provided the heights of the most notable peaks – Everest and Kala Pattar.
Hi David,
Greetings from Peregrine Treks and Tours!
It would be better to join with registered trekking company based in Nepal. If you are interested to go with your friends, we will provide a guide only which cost is USD 20 per day and this includes accommodation, salary, and insurance. Also, you do not need to pay our guide’s flight ticket. We are happy to give your answer, if you have.
Thanks
Pradip
Thanks Pradip. Hope this is helpful for you David. 🙂
I have one question people say Everest trek is best either it’s autumn & spring but m stuck among these seasons which one is perfect for the views and all. I do photography want revealing views of landscapes can you suggest which month is best for me. appreciate if anybody could help
Spring or Pre-Monsoon season occurs during the dates of March to May. This is the time when the cold from the winter (Dec – Feb) decreases and the temperature just starts getting warmer and pleasant. As the fog clears up, you will be able to get the best views of the magnificent scenery. The trekking trails all over the country are laden with vibrant mixes of red, pink, and white offering surreal experience along the trek. Everest base camp trek is also interesting at this time of year due to the expedition as Spring is the favoured season for Everest summit climb.
The autumn or post-monsoon season occurs during the dates of September and November. This is when the rain settles and the weather gets dry. As the cold starts rising the days become shorter. But again, the skies start clearing and you get the best possible views. Most people prefer this time for trekking as the trails are dry and it’s easier to walk. The Post Monsoon season brings a stable high pressure, giving clear skies, sunshine, warm days and cool nights.
I hope this helps.
Thanks so much, Passang, I think you answered that better than I could have!
I’m glad that Passang answered this – much better than I could have! 🙂
Hi, I’m looking into going to EBC with a friend, but we want to have private guides. Where can we look online to hire the necessary crew to accommodate us and our needs?
Thanks
David
Hi David,
I would say the best place to research would be on the Lonely Planet forums here , there is some great information about finding a guide. There are loads of different threads other than just this one as well.
There are loads of agencies you’ll find online too where you can hire a guide but you will get much better value on the ground in Nepal. This book by Lonely Planet might be good for researching and planning your trek also – Trekking in the Nepal Himalaya
Best of luck with the planning!
heading over to trek to EBC solo for xmas, thanks so much this info is such a great help as I had been on the fence about wether I should give in and join a tour company!
Hi Fiona,
That’s amazing! So glad we could help you go on this adventure! How did you get on?
Trekking to basecamp is our future plan but by reading your article we instantly want to go there, like the way you present every thing on detail like advantages and disadvantages on every aspect. Hopefully this article would help every trekkers who want to be independently on the base camp.
Again thanks for posting such amazing article.
Thanks for your kind words! 🙂
wow, nice article- had fun reading it. You just remained me of my Everest trek back in 2018.
I did Gokyo lake though earlier I had planned for Everest three pass but later decided to do Gokyo lake trek. It has an exhausting walk but does worth I could barely feel my knees but inside I was smiling.
Trekking in the Himalayas was one hell of a memory.
Thanks for your comment Josec,
Ya we will never forget trekking in the Himalayas – so incredible!
Probably there is so much research with this article and it’s so readable article. Thank you so much for sharing these kinds of information and exploring the places.Hope to see more and more places in your upcoming articles.
Thanks Marchus! A whole lot of research and an on the ground, real-life experience of actually doing the EBC trek ourselves too! 🙂
Since autumn 2018, rooms are now sold at fixed prices when upper than Namche Bazar: -500Rs at Pangboche, Pheriche, Dingboche, Chhukhung. – 700Rs at Lobuche and Gorakshep. Same prices for solo trekkers. Fixed pricing initiated by the local Khumbu Pasang Lhamu administration, but not officially.
Thanks so much for the update FabGreg. 🙂 It’s so hard to keep up to date with all the changes happening there!
Although I fear highs but this information will definitely benefit the lovers of adventure and I will tell my father about this article 🙂
Thanks Axel!
LOVED this post!.
Thank you for sharing all your information.
It’s definitely very useful and productive. I am going to use this as a reference.
Thank you again.
Hi Abhishek. We’re delighted to hear that you found our post useful. Best of luck with your trip! 🙂
That’s a great article, thank you so much, this is helping us a lot as we are planning our trip in Nepal. It just answer all the question you have in mind, very very exhaustive. Thank you again.
Hi Matteo,
No problem at all – we’re delighted to hear that the post was useful for you. Have a great trip to Nepal and if you have any questions, that we haven’t answered above, just let us know 🙂
Wow, that is a so much information! So glad I read your website! The 3 of us girlfriends are planning on doing the Marathon race in May 2019. Reading your website will help me a lot on what to do and expect while doing the EBC trek. It will be a chance of a lifetime!
Hi Luisa,
We’re so glad that this post helped you! That’s amazing! It will be such an incredible experience and what a place to do a marathon.
Best of luck to you and your friends!
Noelle and Brian – Great job, this post..! So thoughtful and kind of you. I’m planning mine in March 2019 and would request further guidance as below. I am considering solo but have asked a cousin of mine and also a friend who are interested if they can make it the same time so there’s companionship.. I am considering a porter to help me enjoy it more and to contribute more to local economy.
(1) From altitudes on the (very helpful..!) interactive map on the first day to Phakding is it overall downhill and if so, can one try to go all the way to Namche so there’s net altitude gain on day1? Or would that be risky?
(2) If I took a guide/ porter I imagine you pay for their accommodation + meal + for their effort – any suggestion how much that should be? I reckon guide/porter is the same (one) person – is that correct?
(3) For late-March would a sleeping bag good for upto -7 degrees be ok or should it be for colder than that
(4) Should one try for first flight to Lukla from Kathmandu? Is there any advantage doing so?
Would be very grateful if you can help with these. Best wishes for your next adventure.
This was such a good read!
Myself and my boyfriend are planning our trip at the moment!
Like yourselves we are wanting to do it independently, We are arriving in the first week of April. Do you think we will struggling to find ourselves accommodation at this time of year? This is the only worry we have and the decider between going it alone (which we would prefer) or going with a tour / guide!
Thanks 🙂
Katie
Hi Katie,
Thanks so much. We’re so glad that you found this post helpful for planning your trip.
I’d say you will be okay to find space in teahouses along the way in early April. We hiked for 23 days from March 19th so we would have been on the lower end from Lukla to Jiri in early April. We did notice it was a good bit busier when we were going back down from EBC than when we were going up but when we went up the teahouses were fairly quiet, with lots of space.
You are going to have such an incredible time, it’s such an epic experience! 🙂
Hi There,
Amazing guide – was looking sth like that.
I Hope to manage it by myself as You did. But the problem, unfortunately is a money. Could You advise about full amount wich for sure have to be spent for trek: i mean fees, entrances, etc. I plan no guide and sleep in my tent all way up and down. Low costs as much as possible.
Don’t have a lot of resources but lot of dreams.
Looking Forward hearing from You!
Again, nice job!
Hi Wojtek,
“Don’t have a lot of resources but lot of dreams.” – that’s awesome – what a positive attitude! 😀
If you hike independently you can do this trip on a budget. We spent about €15 on average (per person) and that included our flight from Kathmandu to Lukla.When you include the things we bought or rented, the TIMS permit and entrance fee to Sagarmatha National park, we would say it still averages out at €25 a day ABSOLUTE maximum.
We hope this helps and you have a great trip! Safe Trails! 🙂
Hi
Greetings of the day, can we just camp in our own tents rather than just lodging in the tea house in nights. and we are planning to start our trek from jiri to everest base camp. is that a best idea..? and have you seen anyone just camping in their own tents from jiri to ebc.
your reply is greatly appreciated.
Thanks
Hi Maheshwar,
We didn’t see anyone camping from Jiri but we did further up along the trail. They were mostly part of large guided groups though. I’m not 100% sure but I think it would be fine. You may have to pay a small fee to camp in the grounds of a teahouse as I’m not sure if free camping is allowed within the national park.
One of the huge beauties of this trek is the fact that you can stay and eat in teahouses and you don’t have to carry heavy camping gear and cooking equipment. For the effort of carrying the gear and setting up your tent each evening it may not be worth the €2 saving each day but of course, it’s your choice. Just find out first whether or not you’re going to have to pay to pitch your tent anyway!
Enjoy! 🙂
Hi Friend Noelle
I am Aabeejjeet from India.
I plan to go Everest base camp in end of this November 2019.
I want to go solo…no one with me only me .(May be with someone if any one join me) as present plan Single even no guide with me.
Can you tell me is it possible?
If yes i willing to do it.
I have 15 to 20 days
Can you tell me what should itinerary? What permits needed and from where should i get permits?
What minimum cost need from Katmandu – Everest- Katmandu.
Hi Aabeejjeet,
Sorry for the delay in replying. Did you go to EBC in November? How was it?
All of the answers to your questions are already answered in this post about trekking solo to EBC, how long it takes as well as our exact detailed itinerary and how and where to get the permits needed as well as a rough estimate of our costs.
Hope this helps!
Noelle Kelly.
Thanks for reply.
I am happy to say that I done my Solo Everest base camp trek successful exactly 1yr (365 days ) back on 4th December 2019 I was at Everest base camp.
I will happy to share my experience with you.
You may text me on my whatsapp number 9270033440.
I Open to all if anyone need advice about EBC.
Hi Aabeejjeet,
That’s amazing! Thanks for sharing and we’re so glad that you had an incredible trip! 🙂
Hi guys,
Awesome post – we’ve found it really helpful for planning our upcoming trip (next month). I’ve just realised I’ve ballsed iOS nd didn’t specify that we wanted altitude cover when I booked our travel insurance through World Nomads, and I’m not able to add it on – grrrr. While trying to solve this problem, I noticed a tiny asterisk fine print point on their site – apparently you need to be hiking with an approved professional, guide or operator. Did you guys have that caveat, or is that new?
Cheers,
Sam
Apologies for terrible phone-based typos. *ballsed up and…
Hey Sam,
Sorry for the delay in replying! You guys have probably well and truly finished your hike by now! How did it go?
I’m not sure about this exclusion then as it was six years ago now but it may have been there then too. In our travel insurance article we stress how important it is to ALWAYS read the fine print in your insurance policy as we have noticed so many exclusions for different things along the way. Thanks for pointing this out! 🙂
hey there!! this is great thanks for sharing !!
Did you have any issues finding a tea house to accommodate you? we are going as a group of 5 and based on your info I think we will go around the same time of year.
Also when finding a guide there are prices online for $1000USD per person, if we book when we get there do you know if they may just charge the $1000 USD for the group? we don’t need porters.
ONE more question ! sorry .. how did you choose the route that you took? are you happy with it?
Hi Lynn,
No, we had no issues with finding teahouses and there were four of us together on the main part of the trail. I would say if you find a guide when you get to Nepal it will be considerably cheaper than any price quoted online. The number of people shouldn’t really matter, up to a reasonable point of course (10 or 20 people would probably cost more) as the guides charge a daily rate. This also depends on your haggling skills too of course. 🙂
We chose our route by reading the information in the Lonely Planet Nepal guidebook and we added on going down via Gokyo when we were on the trek as we were loving it so much. We were really happy with our route.
Happy trails!
Amazing information. I liked the GPS graph of height and distance walked… The photos are also unique and convey a very different story. Keep us the great work. If you visit Leh Ladakh in India, it will give you tons of opportunity for photos and exciting perspectives.. All the best.
Hi Pranav,
Thanks so much! We’re so glad you enjoyed this post. We actually visited Leh, Ladakh shortly after Nepal and loved it, such an incredibly beautiful place!
Thanx for sharing your experience. I just need a clarification that does I need to take camping tent and sleeping bag for the EBC trek. If yes then why. I can get a room in a teahouse with bed and blankets right??
Hi Prabhat,
There are blankets and beds in the teahouses so you don’t need to bring a tent at all. You only need to take a sleeping bag if you think you will be cold with just a blanket. We both brought sleeping bags and we used them every night as well as the blankets but it’s up to you – if you think you’ll be warm enough with just a blanket. Hope this helps!
Thanks a lot for sharing your wonderful experience. I’m looking forward to this trip with my dad this May. I was looking for some encouragement for traveling independent and found this gem. Thanks again for your wonderful words.
Adventure is out there!
Hi Abhimanyu,
We’re so glad our post has helped you.
Enjoy the hike in May – you and your dad will have an unforgettable experience together.
Namaste!
good to hear your experience about Nepal
Thanks Deepak,
We really loved spending three months in Nepal and the trekking is incredible!
Fantastic post. In fact, out of everything I have read/watched re the EBC, this has post has been my favorite. Independently, I also determined that Shonas was the place to go for trekking equipment. I’ve seen them listed on other blogs and I’ve never seen anything but the best said about them. We are actually planning on doing this mid April with our 9 and 11 year old Sons. We are a full time traveling family and have been looking forward to this and preparing for this for quite a while. I debated having a porter and a guide for a long time but I’m now convinced that given enough precautions we can do this. We are a treking family and have done many hikes, some very difficult hikes, even when the kids were younger. We will definitely take the above average amount of acclimatization days.
Hi Ronnie,
Thank you so much! We’re so so happy that this post has helped you out when planning this epic experience.
We actually met a family on the Annapurna Base Camp trek (which is a bit shorter and at lower altitude) who were travelling with two daughters who were then about the same age as your sons. They had taken a year off work and school to travel homeschooling the girls on the road too. The travel experience seemed to give the girls great life experience as I’m sure it is for your sons too. They absolutely loved the trekking and were also trekking independently and were not big hikers beforehand as far as I remember. If you guys are experienced trekkers I’m sure you’ll have no issues. Going slowly and allowing for extra days if needed should be fine and only add to this incredible trek.
You guys will have such an amazing time! Do be sure to comment again to let us know how you get on.
Namaste and happy trails!
Hey! Just wanted to give an update that we are in Kathmandu and just supplied up at Shonas. Looks like Andy and Shona are nearing retirement but Shonas will live on under new management. Still, the place to go for all your supplies. We head to Luka on the 20th. Just re read this post to make sure I am not forgetting anything. It really is a comprehensive piece. So thankful you wrote it. We will give an update when we are well into it.
I forgot to tell you that we did end up finishing the trek with the 9 & 11year old reaching the top of Kala Pattar and the EBC all the while carrying their own packs. Don’t want to spam your blog but we filmed it all and it’s on our channel. youtube.com/wherethejones
Your blog post was THE post that gave us the most info and confidence to do this with kids.
Wow! That’s so incredible!
We had a look at your video, and it looked so, so amazing! It really, really makes us want to go back and do it all over again.
What an incredible achievement for the boys. We’re beyond thrilled that we helped you and your family to tick this epic item off the bucket list!
Namaste and happy travels! 🙂
Hi Noelle,
We started our trek on Jan.1 in Lukla and made it to Kala Pattar on Jan.8 . and back to Lukla on Jan.11. We ended up going to Pheriche because it was closer than going to Dingboche. We acclimated one day in Namche and did a short hike from Pheriche to Dukla on the 2nd acclimation day. Everything was good till we arrived at Gorek Shep where we spent 2 nights. We lost our appetites and could not get a good night sleep. We found that other hikers had similar problems. Glad to have not gotten sick from high altittude. Both Gorek Shep and Pheriche were very cold after the sun goes down. Several people from the organized tours were medivaced by helicopter from Gorak Shep from illness due to altitude sickness. One good thing about going independent is that you can go at your own pace. When you go in a tour group, it is easy to go at a faster pace to keep up with the group and end up tiring yourself out.
We heard in advance that Kala Pattar was very windy and cold. We got there around 11:45am and had the place to ourselves. The wind was light, blue sky, not a cloud in sight. Our pictures came out similar to the ones on the postcard. Glad we left later in the morning unlike other hikers who opted to leave at 3am in the morning to catch the sunrise but warned of the extreme cold temps. at that time.
Glad we went independent like you two, this trek its probably the hardest thing my son and I will ever do. but it is also very rewarding, thanks again for sharing all your information.
Hi Dien,
We’re so happy that you guys had a great experience on the EBC trek! It sounds very similar to ours – we also went up Kala Pattar later in the morning around the same time as you and had picture-perfect clear blue skies. The groups that went for sunrise on our same morning had no views due to clouds.
Happy to provide you guys with the information to have a such an unforgettable experience together! 🙂
Hello, i really enjoyed your guide,
I will probably backpack next year 3 months together with my best buddy, in the annapurna region and then also the ebc trip.
One thing i am really concerned about, is the backpack. I have no idea which size i will need.
Can you tell me, how many litres your backpacks had? or maybe u got some tipps for me?
We will do it solo, without porter, and about that i found in the internet suggestions between 35l (sounds really small) up to 85l. So not very helpful, because everyone was recommending something different.
We will do the default lodge trekking as you, so the only bigger things we have is the sleeping back, and maybe a down jacket, except that we may have 1-2sets more tshirts, socks, underwear etc but no real clumbsy stuff like tents etc.
For me 65-70litres doesnt sound to bad, but i really dont know. Because i got almost no experience in that stuff, and as mentioned above, in the forums everyone says different things.
Thanks for your advice
Best regards from germany
I currently favor the Osprey Aether 70
70l, 2,3kg
but yeah, i dont know about the size, and also there are people who say, they swear to ultra light traveling backpacks with max ~1kg weight…
As you see, i am completly confused, and dont really know what to think 😀
Hi Maxy,
I know there’s so much information out there it can be stressful and confusing trying to make a choice.
I rented a backpack from Shona’s in Kathmandu because my own backpack at the time wasn’t suitable (it was one of those silly ones with wheels!) and I think it was 55Litres. It was one of their own backpacks which they make themselves so it wasn’t branded. It was perfect for the trek and I had my own rain cover.
Brian had a 65L backpack, a ‘Highlander’ brand at the time. We have no idea how much the bags themselves weighed.
We were both fine with these, though Brian did have to carry my sleeping bag as my bag was a little small. I think a 70L Osprey would be perfect to carry a sleeping bag and down jacket and your clothes, etc. We both have the Osprey Farpoint 70L backpacks now as our main travel bags and they’re great!
I just googled the model you said the Osprey Aether 70 and it looks ideal. If it’s a little empty you’ll be happy to have the extra space available to you.
The most important thing is that the backpack you choose is a comfortable fit, has a waistband, and can be adjusted to your requirements.
We hope this has helped you!
We are actually going to Germany to Cologne at the end of March for a month. Our first time visiting Germany! 🙂
Hello, thanks for your detailed answer!
I also think the 70l are very good, and if we have a bite storage left… then we can still buy some more souvenirs at the end of the trip. 😛
2 strong, young boys, our shoulders will survive a little bit bigger backpack.
But as i have still a lot of time left till the trip, i will first gather all other equipment together, pile it up and then finally decide, whats the best solution.
Yeah, a really good weight lifting system is the most important for me, and i won’t save up on that, because thats something you could only regret if you go 3 months hiking.
—
Nice to hear that, i was also only once in cologne, as i life in another part of germany.
I am sure you will like it, because its a nice city and there are some nice buildings and other stuff. But i also have to admit, that it isn’t something really over exciting compared to other EU/GER Big citys in my opinion. 😀
But maybe i just say that because i am very familiar with the german atmosphere and style, so dont pay me to much attention at that point. 😀
Hi Maxy,
Glad to have helped you sort this issue out! Extra space certainly won’t be an issue.
Looking forward to checking out some other parts of Germany while we’re in Cologne too!
🙂
Hi,
I’ve just been reading this in Kathmandu planning my own independent trek to EBC. I can’t tell you what a great resource you’ve made. Great info, relatable for the average traveler and I love how you cover the little details! (Where to find apple pie, essential nature of the wet wipe!) Your photos are incredible too.
Happy travels!
Nick
HI Nick. Thak you so much – We’re delighted you found the post useful and hope you’re enjoying your time in Kathmandu! We hope you enjoy your trek, it’s such an incredible experience – enjoy every moment! 🙂
Hey Noelle and Brian
First of all, congratulations on finishing up on EBC and checking that off your bucket list. I am glad that you have not only created a ultimate guide for trekking this piece of Himalayas independently, but also have made effort to respond to people in real time (almost). I wish that you guys have more time and resources to continue on your other endeavors. I plan to go to EBC (independently) sometime next April, and this definitely is a wonderful start and confidence breather for me. Even after six years (almost) you have memories of that trip to such detail and Im sure that itself speaks volumes of the experiences you might have had all through your “Trek”. Looking forward to this one and thanks for the post/help and time.
Cheers
Hi Ravi,
Thanks so much for your lovely comment.
Yes, the EBC trek made a huge impression on us as it no doubt will on you too! It’s still one of our most loved travel memories!
We’re so glad that this post has helped you to plan your own trek on to Everest Base Camp!
Have a great trek in April!
Hi Noelle and Brian,
I did the solo and independent trek to Tengboche 2016 and absolutely loved it. Thanks again for your wonderful guide. Would like to take my son and go to EBC around the first week in January next month.
Your EBC trek said you took 9 days to go from Lukla to EBC, how many days would you estimate it would to return to Lukla if we came back the same way? We intend to stay at the tea house along the way and not carry camping gear. Let us know if this is a feasible itinerary ( I did ok not acclimatizing on the last trip so did not include any this time ):
Day 1: Lukla to Phakding
Day 2: Pahkding to Namche
Day 3: Namche to Tengboche
Day 4: Tengboche to Pheriche ( is one day adequate?)
Day 5: Pheriche to Dughla
Day 6: Dughla to Lobouche
Day 7: Lobouche to Gorak Shep to EBC
Day 8: Return to Lukla (how many day total ? )
Are their adequate teahouses to stay in after Tengboche?
Thanks again for you guide and help.
Hi Dien,
We’re so glad our guide has helped you out!
Your itinerary sounds perfect, however, I would highly recommend taking the acclimatisation days in Namche and Pheriche if you can fit them in at all. If you wanted to save some time you could go from Periche to Lobouche in one day as that is only a suggested safety stop not a recommended one and would only take about four hours walking in total, so that pulls back one day. The Pheriche stop is probably more vital than the Namche one as your body will be at much higher altitude than ever experienced before and because you were okay before doesn’t mean you will be again. You will also need to consider your son’s acclimatisation too.
It took us five hours to get from Tengboche to Pheriche so I think one day is definitely enough for that part.
There are enough teahouses after Tengboche and January is not a high/popular hiking season so the teahouses shouldn’t be busy. Do be prepared for much colder weather in January however.
Definitely, do allow enough time to hike up Kala Pattar as this is the highlight of the whole trek in our opinion offering panoramic views of Everest and the Himalayas.
It should take you three days to get back to Lukla if you went up Kala Patter in the morning and then started to head down. Friends of ours made it back down to Namche from Gorak Shep in one day but they said it wasn’t ideal and their feet were blistered etc. after such a long day. They only pushed so hard as they needed to reach an ATM to get cash in Namche. So if you didn’t hike Kala Pattar and were prepared to just walk as much as you could each day back to Lukla you could reach Lukla in two days but I think three days would be more enjoyable and gives you time to go up Kala Pattar too.
Best of luck,
Have a great trip with your son!
Hi Noelle,
Thank you for your recommendation, we will take another acclimatization day and also go to Kala Pattar. Another question for you, you guys went from Tengboche to Pheriche and stayed at Pheriche. I noticed many tours opted to do the Tengboche to Dingboche and stayed in Dingboche. Which route do you recommend recommend since we’re there for a day acclimatizing, thanks again.
Hi Dien,
Sorry for the delay in getting back to you. You guys are probably having an awesome trek already!
We decided to stay in Pheriche because The Himalayan Rescue Association has an aid post there run by volunteer doctors from around the globe. They give daily talks and demonstrations about altitude sickness every day and it’s also believed to be the highest hospital in the world! It makes for a useful and informative way to pass some time on your acclimatisation day.
You can also walk over to Dingboche to check it out as part of your acclimatisation day walk too if you’d like!
Hope you guys are having a great trip! 🙂
Hi, thinking of trekking to base camp independently mid November,
just wondering if i go there, will there be spots to sleep in the tea houses or do they ever get booked out?
like how do you know if there is gonna be any space ? should i bring my own tent?
thanks
Hi Carlos,
As it’s not the main trekking season you should have no trouble getting a spot in the tea houses.
Even if they are full they still try to accommodate people by letting them sleep in the common areas, etc. In some teahouses, they will call ahead to a teahouse in the next village for you if you’re worried about not having a place, but I think in mid-November you should be fine.
Best of luck with your trek!
hi Noelle,
thanks for the tips! also awesome guide 🙂 Just also wondering ive seen alot of people posting that the guides are roughly around $20 a day,
my cousin is thinking of coming with me, is that $20 a day each or would that be between the 2 of us?
thinking it may be a bit safer to hire either a guide or porter to help with our trek
thanks again
Hi Carlos,
I think that would be $20 between the two of you. You can hire a guide/porter in Lukla for better value too!
Are you guys trekking now?
Namaste!
Hey guys! Amazing post. Answered a lot of my questions. A friend and I are doing the trek independently in November. The only thing bothering me is the chance of getting seriously ill from altitude sickness…we are taking our time with the trek, taking 3 or 4 acclimitization days on the way…also bringing diamox just in case….should I still be worried about it? I made the mistake of reading too many stories online about deaths due to altitude sickness. Scares the shit out of me!
Hi Alex,
Thanks so much, we’re so glad that this post helped you out!
Altitude sickness is obviously an ongoing concern and a justified fear!
If you have 3-4 acclimatisation days built in, you should be fine! Even by allowing some time in Kathmandu before you go trekking, your bodies will be adjusting to the altitude there, as the city is at an elevation of 1,400m.
We took three acclimatisation days on the way up to EBC and the absolute bare minimum recommended is two – one at Namche and another at Pheriche. If you’re going to take your time and allow enough days to rest, you guys should be fine. Just remember to “hike high and sleep low”, meaning the place where you sleep shouldn’t be the highest point you’ve reached/crossed over that day. This is usually the case naturally without having to worry about it too much. After you reach 3000 metres your sleeping altitude should be no more than 300 metres to 400 metres higher than the previous day’s sleeping altitude. Again this is usually the case anyway if you follow the usual overnight stops on the trail.
Even on your acclimatisation days, you should go on a short walk up to a higher point as this gives your body the best chance to get used to the altitude. And if you do feel unwell take an extra rest day and/or go back down to a lower altitude and you should feel better. It’s more than likely that you’ll feel some very mild symptoms of altitude sickness, like a headache, as most people do, but if you listen to your body you’ll know if it’s becoming a more serious concern.
The people who end up dying from altitude sickness are the ones that ignore the symptoms and push on higher anyway determined to reach their destination. Maybe these people are rushing and don’t have the time to allow for extra days and are not willing to go down if they feel unwell because of time constraints. The Himalayan Rescue Association’s daily talks and demonstrations about altitude sickness at the aid post in Pheriche will really put your mind at ease too, or freak you out more 😉 but we found it was really great to have more information from them too and it’s good way to pass some time on your rest day.
I hope I’ve put your mind at ease about altitude sickness!
Have a great time in November, Nepal is amazing – you’ll love it!
Namaste and happy trails! 🙂
Really useful tips and information for backpackers and budget travelers, it helps them to trek to Everest without guide.
I love the idea of independent travel. Thanks for sharing information i like the picture where you are standing at the top of kalapatthar, in-front of Pumori. Great pictures too thanks for sharing.
Thanks Shankar,
We loved our time trekking in the Everest region and visiting Nepal!
Namaste!
Gotta go up there in next april. looking forward for the trip. thank you again for sharing the tips
No problem Shawn, we’re glad we could help! Enjoy Nepal! 🙂
Noelle, this is amazing! really informative post for all levels of trekkers to Everest base camp, day to day activities, information with picture really useful thanks for sharing.
Thanks so much Shankar! 🙂
One of the most popular trekking destination in the world, i have been trekking with group more than 500 times but never feel bore to go EBC. i enjoy every steps in this areas because every steps offer you unique and marvelous views. please make a plan to do it.
We couldn’t agree more.
It’s definitely one for the bucket list and something you’ll never forget. Such an incredibly beautiful place. We’d go back and do it all over again in a heartbeat!
Hi Noelle Kelly i want to go solo trip for Everest Base Camp and don’t want to go with guide and all so and all time i go solo without guide so is there safe for solo person ? and also want to know that if i don’t want to use by flight for Lukla Airport because i want to go by walk and trek so is there any way for walk or trek base camp directly from Salleri/Phaplu ?
Thank you !
Dharamesh.
Hi Dharmesh,
So sorry for the late reply to your comment! I must have missed the notification about it and only noticed now! 🙁
I think the hike is quite safe to do solo, especially so for a solo male hiker. My only worry would be if you fell and sprained an ankle or some unlikely accident like that that there would be no one with you to help. The trails are busy enough with locals and someone would come along eventually but maybe carry a mobile phone to be safe. There are notice boards in Kathmandu and online forums where you can connect with other solo trekkers who are looking for company if you’d feel more comfortable with other people.
Yes, there is a trail from Phaplu too, it takes about 4 days to reach Lukla from there and it joins up with the main Jiri-Lukla trail just before you reach Lukla. From there it’s the same route on to EBC.
Happy trekking and Namaste! 🙂
Useful and informative! Climbing to EBC is on my bucket list and I hope to climb on Sept-Oct, 2018. Thanks Noelle Kelly! Keep writing and sharing!
Thanks so much Rakesh!
We really hope you get to check it off the bucket list next year!
Namaste! 🙂
This was a fantastic guide! Stunning pictures too.
Do you have any idea whether it is possible to simply camp along the way?
Either pitch a tent or simply bivvy under the stars. Are there any regulations surrounding that?
Thank you!
Thanks Stan, we’re glad you found our guide helpful. In relation to camping, many of the tea houses have outdoor areas where you can erect a tent or set up a bivvy sack. With that said, it’s extra equipment to carry and given that the teahouses are so cheap, most people will choose to sleep in the comfort of the guesthouses. Mostly it’s organised groups that camp as it guarantees they will have enough space for all the members of their group – porters walk ahead and set up the tents before the hikers arrive. If you want the experience of camping in the Himalayas though, by all means, go for it! Have a great trek! 😀
Such a fantastic post guys! Thank you so much for sharing & being so incredibly detailed! We so want to do EBC but had been unsure whether it was beyond our limits – some people we have spoken to said it was the hardest thing they’d ever done and this really put us off! It’s great to know that it is accessible to anyone and that you can do it alone! What an achievement! Hopefully you’ll see us doing it some time soon! X
Hi guys,
We’re so happy to hear that this post has helped and inspired you! That’s one of the main reasons we put this post together – because people were always asking us about it and how it was possible etc., how expensive it was, thinking it was so far out of their reach.
Hope you guys get to do it soon!
Safe travels! 🙂
I was thinking about staying a night at Everest Base Camp. I sort of want to climb to the top of Everest but know that realistically that’s not going to happen so this would be my next best thing. Do you have an idea of how I could arrange this in March/April? earlier n the thread you seem to recommend against it. Is it not a place that is good to hang out at?
Hi Bronwyn. Sleeping at Everest Base Camp itself is possible but it depends on the season – however, we don’t recommend it – altitude sickness, the cold and changeable weather are all serious considerations here and it is not something to be taken lightly! We would recommend staying at Gorak Shep.
Climbers tents are set up during March/April so if you are there then you might be lucky enough to be invited to stay at the tents, but you can’t bank on it. If you are planning on staying there we recommend bringing a lot of water, food and obviously plenty of warm clothes, thermal layers, down jacket and a four season sleeping bag. And please don’t attempt this alone or without consulting with a local – also, be sure to let someone know of your plans.
Best of luck with your trip – hope you have a great time in the Himalayas! 🙂
Hello
It is beautiful article regarding to Everest base camp and Cho la pass trekking.
I just like to update trekking permit fees (specially Sagarmatha national park permit cost) is increased to NRs 3490 from NRS 2000 and TIMS fees is still same.
Thank you so much for letting us know about the fee increase. 🙂
Hej, great blog. I have a question. Can you pay for teahouses and food with US dollars or they want rupees?
Hi Andraz,
Thanks so much! We carried Nepali rupees when we did the trek so I’m not sure if US dollars would be accepted but maybe! Safer to just bring rupees I think!
Have a great trek! 🙂
Hi
Thank you for sharing your experience and making it seem very doable for a novice. I am fit but a little unsteady due to early Parkinson’s. Trekking in the Himalayas has always been on my bucket list so need to do it sooner rather than later. A friend who has trekked regularly in Nepal has offered to take me with him next year on the Gokyo trek. Clambering over rocks is not an issue but narrow trails with steep drops would be a challenge (probably manage with poles). I was keen to get some feedback on the paths and surfaces as this would be my main obstacle. I have walked on trails in the bush and on moors without difficulty. Thanks.
Hi Gunvant,
I’m so sorry to hear about your early Parkinson’s and good on you for taking the chance to do the things you’ve always wanted to do!
The trails on the main EBC trek would not be very steep or narrow but there’s a part of the Cho La pass that was quite narrow when we crossed. This may be different when you visit due to weather conditions as it was an icy verge so maybe it was more melted on the day we crossed. Most of the paths on the main EBC trail are wide enough to get yaks or horses through, with the Gokyo trails being a little narrower in parts. I don’t remember many steep drops except maybe a bit going up and down from the two passes as you’d expect.
I think if you have walked on trails in the bush and moors you’ll probably be okay with the surfaces there. The trails are mostly gravel or stone paths with some grassy verges. It might be good to ask your friend as he’ll know your comfort level and the trails in more detail if he treks in Nepal regularly so he can probably make a better judgment.
I hope you get to tick trekking in the Himalayas off the bucket list! 🙂
Dear Noelle
Thanks for being such a great sport and providing an invaluable service. I feel confident I can manage it given your description.
Warm Wishes
Gunvant
Hello, Fantastic blog.. so useful.. and amazing photos.
Can I ask what camera/lens you carried with you on the Everest trek to take such wonderful photos?
thanks,
Paul, Cork.
Hi Paul,
Thanks so much for the compliment. A fellow Cork man! 🙂
At the time we were shooting with a Panasonic Lumix G series and the kit lens with an added telescopic lens (45-200mm) – it was a micro four-thirds camera so it was a bit smaller/lighter than a standard DSLR. We found this to be a great option for travelling and especially trekking.
Now we have traded this camera for the Canon EOS 70D with the EFS 18-55mm lens and EFS 55-250mm telescpoic lens which we’re now using for all of our travel photography.
Hi Noelle,
Many thanks for the your very informative reply re your photographic equipment.
Hope all is well in Oz.
Regards,
Paul
Hi, what a great read! I’ve just added you guys on Facebook My question is how hard is it finding your way? Are there signs or is some basic map reading required? Or is it really so busy as to just follow everyone else? Thanks
Hi Dan,
Thanks for adding us on Facebook and sorry for the delay in replying to you.
It really is quite easy to find your way, ‘follow the yellow brick road’ was a phrase said to us by the mountaineer Andy that we mentioned in this article. The main trail to EBC is quite obvious and is the only trail. It’s a good idea to bring a map and there will be some basic map reading. There aren’t many signs as far as I remember.
It depends on the time of the year you do the trek as to how busy it is but you trek during the main seasons of March/April and October there will be other trekkers, guides, porters and local people up and down the trail. The mountaineers who attempt to summit Everest every year attempt to do so in May so the supplies and equipment for them are walked up by porter and yak so March/April sees a lot of action on the trail because of this as well as being the second busiest season for people to do this trek.
Happy planning and do let us know how you get on! 🙂
Hey, love reading your stories.
Just one question really did you pre-book the flight into Lukla?
Cheers Will
Hi Will,
Thanks so much!
Yes, we booked the flight to Lukla about a week or two beforehand through a local tour operator in Kathmandu. We spent some time going in and out of different tour agencies to get an idea of the best price because at the time all of the smaller Nepali airlines that fly the route to Lukla weren’t on Skyscanner or similar booking sites.
🙂
Hi,
When exactly did you do your trek?
Im planning on the mid March 2018 and can you tell me what the weather was like and how cold it got at night?
I heard that the only way to get good accommodations is to have it booked thru hiring a guide/porter. Good accommodations could include western toilets, cleanliness, possible heat sometimes. Any comments on this?
What were your experiences with the tea houses and can you recommend any?
Also, without a guide did you feel you missed any cultural or geological information that enriches the trip or where you able to pick up enough information to feel connected to your location?
Thanks so much.
I was afraid to do the without a guide but I am thinking more on doing it your way.
Hi Kass,
We did the trek from the 19th of March to roughly the 10th of April in 2012. It got coldest at night at the higher altitudes. Still, we were very warm in our sleeping bags and I slept with a long sleeved top and leggings and socks on in a four season sleeping bag on the coldest nights. Brian had a three season sleeping bag and slept only in his underwear but he is more warm blooded than me. Once you’re in your sleeping bag it gets very cosy – the worst is if you have to get up to go to the toilet during the night and leave the cocoon of your sleeping bag! Most teahouses even provide blankets to put on top of your sleeping bag if you need more layers.
The weather was very clear and sunny most days. We had one or two days where we had some bad weather but it usually passed quickly. We even walked in a snow storm as we crossed the Renjo-La pass but this is on the Gokyo trail so if you do the main EBC trek you won’t cross over high passes like that where the weather getrs more erratic.
We did the trek independently and always had adequate accommodation without booking ahead. Most places are very clean, have toilets, many will have Asian squat toilets, some had western toilets and all have heating in the common area but remember, they are basic accommodations.
We loved staying in teahouses and we used to just check out the different ones in a village when we arrived (if there was more than one) and pick the one we liked the most. We can’t really remember the names of any in particular to recommend at this stage, sorry!
We felt we were able to pick up enough information ourselves along the way without a guide and we had a Nepal guidebook for information too. You can always chat to other people’s guides and porters in the teahouses in the evenings and the families who run the teahouses too, so you’re still always interacting with local people all the time.
I hope this helps. You will love the experience either way you choose to do it! 🙂
Hi Noelle,
Im also very interested in any info about doing the trek, i am probably going to do the trek by myself around the end of Feb, so any info would be greatly appreciated.
Thanks!
Hi Dean,
Sorry for the delay in getting back to you. We were working in a remote part of Australia the past few months with terrible internet connectivity so catching up on everything online now.
Did you do the trek in February? How did you get on?
Hi Noelle,
Thank you for continuing to share even nearly five years later, bet you are itching to go back and do it again. A mate and I are trekking in early March hoping to get on the track before the masses. Looking to hire an English speaking guide/Sherpa which we intend on hiring in Lukla, keen to provide a job to the locals and get an insight into their culture. Do you have any recommendations of who we should use? Can Shona’s Alpine rental in Kathmandu assist with that?
cheers
Graham
Hi Graham,
So sorry for the delayed response to this. We were in rural Australia for the last few months with terrible internet connectivity.
I realise you are probably mid-trek now! We hope you got sorted and I’m sure the people at Shona’s sorted you guys out. We wouldn’t have had a recommendation for a local guide in Lukla anyway. You’re probably having an awesome trek as I write this! Please let us know how you got on!
Namaste!
Still have a few questions and am hoping you will reply. We already got our tickets to Lukla but am still wondering what hostels you might know of that will store some of our gear while we are trekking, as well as if you would recommend a map or gps?
Hi Spencer,
Sorry for the delay in replying! We’ve been having some internet connectivity issues here in rural Australia!
The hostel we used when we were in Kathmandu was Family Peace House, here’s their website http://www.familypeacehouse.com and it says in the facilities tab that they provide free luggage storage so I guess they will still store your bags. We also had a lot of gear when we went as we were also on a year long trip so you guys should be fine!
We only used a map when we did the trek but if you have a GPS I guess there’s no harm in bringing it along. I’d still recommend bringing a real map as well though as there might ne connectivity issues in the mountains so better to be safe than sorry.
You guys will love the trek – I’m slightly jealous right now and would do it again in a heartbeat! We’re so happy thay this post was uselful to you and helped you out!
Have a great time in Nepal and happy trekking! 🙂
Me and a few buddies are planning to do the EBC trek solo, starting in April 2017, we are going to have a lot of gear because we will be backpacking through Asia for a year-and-a-half, do you know what hostels in Katmandu will store extra luggage of ours while we are doing the trek? Also, would you recommend a GPS, or would a map do just fine? One last question, haha, how much was the ticket from Katmandu to Lukla?
Thank you for this guide it was extremely informative and really helps put my mind at ease!
Hello,
Thanks for excellent guide for EBC.
I am going to use this as reference.
I am going solo but going to hire guide-porter so I can give some employment to local people.
Hello,
Thanks for writing this guide for EBC.
I am going to use this as reference. I am going solo but going to hire guide-porter so I can give some employment to local people.
Hi Hom,
I’m so glad that you’ll use this post as a reference. And it’s great to give some employment to local people too.
Well done! Enjoy the trek! 🙂
Thank you for sharing all the info! It’s definitely very useful as my friend and I are heading there in September 2017! (Will try to do it independently after reading your post!) May I ask if there is a map showing the location of all the tea house or accommodation along the trail? Again, thank you very much for sharing all these with us!
Hi Cayden,
I’m so glad this post was helpful to you. You’ll love the trek! Yes, as far as I remember the map has a legend showing the number of teahouses in each small settlement along the way. You can buy the maps in Kathmandu.
You’re so welcome for the info – happy to help fellow adventurers! 🙂
LOVED this post! My husband and I want to go end of March this year. We read that the government started requiring hikers to have guides in 2014. Did you have any troubles with that at all? We would love to do it on our own! Looks like an adventure of a lifetime!
Hi Britanny,
So glad that you enjoyed this post. We did the hike in March 2012, there are always rumours that they’re going to start making guides mandatory but so far they haven’t to my knowledge.
It really is the adventure of a lifetime! 🙂 Best of luck!
Hi Noelle.
Guides have been mandatory on the trek since 2014- not sure how enforced or enforceable this is though
Hi Jimmy,
Yeah, I’ve read that it is technically a requirement to have a guide but that it’s not really enforced or a legal requirement. You can still obtain a TIMS card as a free individual trekker from the Nepali tourism board and enter into Sagarmatha National Park too, so I guess they’re not enforcing the mandatory rule for whatever reason. Thanks for your input and I’m sure someday they might make it a requirement. We really hope not though!
Hi Noelle, thanks a lot for explaining how to do the trek without a porter. I’d much prefer it that way but am a bit concerned with the safety, since I’d be on my own. Am scheduled to arrive at Kathmandu on Nov 26 and stay until Dec 13. Plan on visiting Shona’s to get some tips and extra gear for the way. Was it easy to find the Permit Office?
Was the trail always easy to find once you reached Lukla? Did you have any difficulty to find accommodation for the evening stops? Did you plan ahead at which small town to spend the night? Is it possible to sleep at EBC or is it safer to visit but sleep somewhere else? As for the size of the back pack, I have a 90ltr but think it might to be big, even if I dont fill it up. What do you think? Should I try to borrow or rent a 60ltr one instead? How do people usually treat Altitude Sickness (any tea or aspirin that people recommend?)
Once again, thanks a lot for taking the time to help trekkers trying to enjoy such a beautiful adventure. Kind Regards.
Hi Carlos,
I’m so glad that you found this post helpful! 🙂 Shona’s is a great place to get started – they’re full of great information, extremely helpful and you can rent or buy everything you’ll need for the trek from them.
As for the permit office, it’s right on the trail at the entrance to the national park so it’s very easy to find. The main trail is fairly obvious and easy to see the way from Lukla.
We didn’t have any difficulty with accommodation at all and in November/December, I’m sure you won’t either as it’s not a very popular time to do the hike. The main seasons are April and October and we did it at the end of March and had no problems. You may have to keep an extra eye on the weather as it’s likely to be colder when you do the trek so definitely rent a warm four season sleeping bag and jacket for the evenings if you don’t have your own. We usually planned how long we were going to walk for each day and where our stop for the night would be. We pretty much followed the itinerary laid out in the Nepal Lonely Planet book for the hike.
I’d say it definitely won’t be possible to sleep at EBC in Nov/Dec as they only set up the tents there for the climbers who summit Everest in May. You’d be better off to sleep at Gorak Shep because of the altitude and there are no teahouses at all at EBC so you’d have to have your own food, water, etc. Besides, Gorak Shep is the start point for Kalla Pattar which steals the show from EBC in terms of views anyway!
As for the backpack, yeah, I think 90litre will probably be too big, but as you said, you could always bring it and not fill it up too but you can also rent smaller backpacks so that’s completely up to you. I’m sure the extra space could come in handy if you need to pack more warm layers of clothes for winter time.
Altitude sickness is definitely a real concern. If you notice any serious symptoms, descend as fast as you can and they should get better. You can buy Diamox in Kathmandu which helps with the symptoms too. Nepali people swear by garlic soup to cure all ailments and the milder symptoms of altitude sickness. It definitely works and tastes nicer than it sounds – especially if you like garlic.
Best of luck with your adventure and do get in touch if you have any more questions.
Happy trekking! 🙂
Hi Noelle and Brian, Thank you for sharing all your information. I always like to go independent when traveling but hesitated for this region until I read your article. Let me know approx. how long it takes to hike from Lukla to Namche and then to Tengboche and then back to Lukla.
Do you think 4-5 days is adequate. I am also planning to go solo, is it safe and are there signs and trails clearly marked. Thanks for your help.
Hi Dien,
No worries, so glad you found this post helpful! 🙂
There weren’t many trail markers at the time when we did the trek but the main trail is a fairly wide, obvious path. There are locals in the small villages you pass through that you can ask the way too. If it’s a busy time for trekking there will be porters carrying goods up and down to the teahouses, as well as trekking groups with guides. It’s very safe especially if you’re hiking at a busy time like April/May or October, there’ll be so many people!
It took us two days to get to Namche, where we had to take an acclimatisation day for safety to get used to the altitude and then it took only a day to get from Namche to Tengboche. So that was four days. You can easily make it back to Lukla from Tengboche in a day as you can go faster when you descend. So I think your plan of 5 days would be perfect! You’ll really enjoy it!
Happy trekking and Namaste! 🙂
Hi Noelly , I am planning to do this trek by myself (SOLO) and I want to know if easy to find the way , Does the route have signs? , it easy to find where to sleep?. I hope you can reply , I will be more than happy to have your help. cheers Elisa From Perú ( now in Germany)
Hi Elisa,
There weren’t many trail markers at the time when we did the trek but the main trail is a fairly wide, obvious path. There are locals in the small villages you pass through that you can ask too. If it’s a busy time for trekking there will be porters carrying goods up and down to the teahouses too. As well as groups with guides.
We just used a map when we did the trek and it was easy to find the way until we went off the main trail when we descended via Gokyo, it was a little more difficult to see an obvious path. When you reach the small villages they all have teahouses and to find somewhere to sleep is no problem. You can even call ahead from the last teahouse and reserve if it’s not a really busy season for trekking.
Hope you enjoy the trek! We can’t wait to visit Peru! 🙂
Hi Noelle, what about the general orientation and waymarking on the trail? Is there any?
I plan to do the trek solo in December, there won’t be many hikers around that time.
Did you use GPS on your way? Or a map and following the markers (if there are any) was enough?
Thank you for your time, wishing you many great journeys!
Artur
Hi Artur,
There weren’t many trail markers at the time when we did the trek but the main trail is a fairly wide, obvious path. There are locals in the small villages you pass through that you can ask too.
Yeah, there probably won’t be many other hikers in December and maybe some snow on the ground might make the trail hard to see so maybe GPS would be a good idea. We just used a map but I’d say with GPS you couldn’t go wrong.
Hope you enjoy your trek! 🙂
Hi Noelle, thank you for all the helpful info – it’s exactly what I had been looking for! My husband and I are off to Nepal in November and hoping to do a very similar trip. I just wondered which map you found the most useful on your trek?
Thanks so much
Hi Beatrice,
I’m so glad that you found this post helpful when planning your trip to Nepal. I’m sure your husband and you will love it there! We bought a map of the Sagarmatha National Park as far as I remember – it could have been specific to the Everest Base Camp trek but I think we used a map of the whole park. There are loads of maps for sale in Kathmandu anyway so you’ll easily pick them up there when you arrive.
Happy trails! 🙂
Hi Noelle,
Your guide is awesome, thanks for all the helpful
Info. My bf and I are wondering What insurance company you guys used for your everest trip ?
We are trekking independently the three passes route and struggling to find an insurance company that will cover us trekking without a guide…
Any help would be much appreciated!
Hi Kelly,
Thanks so much – glad you found this guide useful! We always use World Nomads when we travel, they are one of the only travel insurance companies that will cover you for altitudes higher than 4,000m. They are known as the adventure travel insurance company. Afterwards, however, when we read the fine print in detail we discovered that we were not covered when trekking without a guide!
The Cho La pass is supposedly the hardest pass of the three. As a workaround, you could hire a guide for just this section which in hindsight may have been a good idea as it was a bit sketchy, or try to follow some trekkers with a guide in front of you if there are any!
Hope you enjoy the trek! 🙂
this is amazing! thank you!
So glad you find it helpful Leo!
You’re welcome! 😀
Hi Noelle,
So inspired by your incredible journey. I am really keen to trek EBC this December. Solo. Might even explore CLP if I feel good after EBC. I know there are concerns about safety trekking alone. I might just hire a porter guide at Lukla. I am fit. 57yo. What is your advice on this?
Hi Willie,
So sorry – I must have missed your comment on this! Did you do EBC in December?
Brian and Noelle are great, It is so useful information about Hiking to Mount Everest Base Camp, keep on posting and promoting Nepal Tourism. best of luck!
Hi Surya,
Thanks so much for your kind words!
Namaste! 🙂
I must thank you for this post..
I’m heading to Nepal on the 4th of August and you have convinced me to do it independently now. Im so excited.
What makes it better is ye are Irish and from Cork like myself ( well, I’m from Waterford but claiming Cork as my home now 😀 )
Thanks guys
Hi Darren,
We’re so happy you found this post helpful and thrilled we convinced you to do it independently! You won’t regret it – it’s an incredible trek! Kala Pattar is the icing on an already amazing cake! Enjoy!
P.S. Bring a marker or a pen to sign the big rock that says Everest Base Camp when you get there, we didn’t have one so guess we’ll have to go back! 😉 Oh, and an Irish/Cork/Waterford flag if you’d like that picture – we also didn’t have one then so will definitely have to do it again! 😀
Hi Noelle!!!!
Relly nice and very usfull your post.
My friends and I, we are planning to go to the Everest Base Camp.
If it is ok, I would like to ask you for some detail..
We have some questions you have, with or without guide?, we are going on October, I affraid it could be difficult to find beds in the teahouse, do you know if it possible to make some reservatiosn in advance?
Thank you really much for your post!!
Adelina
Hi Adelina,
I’m so glad you liked the post and find it helpful.
We heard that it was possible for guides to book places ahead of time but we went without a guide. We also did the trek at the end of March right before the second busiest period so we didn’t have to really worry about this. October is the busiest month for people to do the trek but maybe after the earthquake last year, not as many people are visiting Nepal as before.
I would definitely wait until you are in Kathmandu to organise a guide if you choose to use one as you will get better value on the ground than booking ahead online.
In some teahouses, you might be able to ask the owners to call ahead to the next village to book for you because a lot of the teahouse owners have relatives in the next village and will recommend you to stay with their sister/brother if you’d like in the next place anyway, so maybe that’s possible. Worth a try!
Have a great time in Nepal! You’ll love it there. If you have any more questions, get in touch!
Happy trekking,
Noelle
Awesome post.
I love the idea of independent travel.
What about buying flight tickets from Kathmandu to Lukla.
I am thinking arriving late September 2016.
Can I just buy the air tickets when I arrive in Kathmandu?
Bugeting total of 28 days from San Francisco to EBC and then back home.
Thanks
Hi Chandu! Yes, we bought our tickets from Kathmandu to Lukla when we arrived in Kathmandu – it works out much better value than booking them from abroad. Shop around a bit to find the best price. Have a great trip! 🙂
Great post, we did the Tibet Side a year ago. Have had lots of offers to hit this side but none have worked out with our schedules. Makes me want to clear everything and just go. Travel ON!
Hi David! Thanks for your comment. We would absolutely love to visit Tibet too and think that it would be really cool to have experienced both sides of Everest. Someday! 🙂
Great guide. I’ve done Annapurna circuit a few years ago and I’m thinking about doing EBC along Gokya in November. Don’t want crowds tho!
I think I might know your friends too if they are from Tuam! Thanks for the info!
Thanks Robbie.
We’re so glad you found this post helpful. November should be less busy alright, although it will probably be colder at altitude.
That’s mad – they are from outside Tuam, Abbeyknockmoy. Small world! 🙂
Noelle, this is amazing! I honestly had no idea that it was reasonable to hike to base camp without a guide, but now that I know it is, it’s definitely on the list. Thank you SO much for putting this amazing guide together!
Hi Liz, thanks so much! I’m so glad that this post will come in handy and that it’s added something extra to your wanderlust list! 😉 It’s such an incredible experience – we highly recommend it to everyone. You’ll love it! Hope you have a great time whenever you go to Nepal, and if you need any more information on anything, give us a shout! 🙂
Thank you very mach for your advice!… May be later I will have more questions!!
No problem Adelina, happy to help! 🙂
Hiking to basecamp has been on our to-do list for so long. Like you we want to do it independently. So glad you put this guide together. Thanks.
Hi Tim! No problem! I’m so glad you’ll find this guide useful. The EBC trek is definitely a bucket list activity! Hope you guys have a great time when ye go to Nepal. And if you need any more info be sure to get in touch! 🙂